Start With 10 Feet: Fire Pit Placement Homeowners Need, Per Contractors
Start With 10 Feet: Fire Pit Placement Homeowners Need, Per Contractors
Plan for at least 10 feet of horizontal clearance from your house as an absolute floor, but treat that as a starting point, not a target. Many local codes require 15 to 25 feet, and manufacturer instructions can override both. Check your local fire authority and the pit’s installation manual before you dig, pour, or set a single paver, and lean on NFPA style guidance and a contractor like Jackpotlandscape when the answer isn’t obvious.
TL;DR:
- Most codes require at least 10 feet of horizontal clearance from structures and five feet of cleared vegetation, but many recommend 15 to 25 feet for safety.
- A minimum of 8 to 10 feet overhead clearance is needed for wood-burning pits, while gas units may require only six feet, depending on manufacturer instructions.
- Extending the base material at least three feet beyond the pit’s outer edge is essential to prevent ember spread and provide a stable surface.
- Proper placement depends on testing wind patterns at dusk using smoke or incense to ensure smoke drifts away from seating areas.
- For lasting installation, a properly compacted paver or stone base with good drainage outlasts gravel or grass, especially in climates with heavy sun or seasonal rain.
Table of Contents
- How Far Should a Fire Pit Be From Your House?
- What Base Materials Work Under a Fire Pit?
- Where Should You Put a Fire Pit for Comfort and Safety?
- Do Wood-Burning and Gas Fire Pits Need Different Placement?
- How Do You Check Local Codes and HOA Rules Before Installing?
- Fire Pit Placement Checklist You Can Run This Weekend
- Fixing the Most Common Fire Pit Placement Mistakes
- What Jackpotlandscape Sees Most Often on Installation Calls
- Why Slope and Drainage Matter as Much as Distance
- How Climate and Weather Shape When and Where You Build
- How to Light the Area Around Your Fire Pit Safely
- How to Place a Fire Pit Without Bothering Your Neighbors
- Which Direction Should a Fire Pit Face?
- Which Approach Actually Works: Wood, Gas, or a Professional Build?
- How Jackpotlandscape Builds Fire Pit Areas That Last
- Sources
How Far Should a Fire Pit Be From Your House?
The distances that matter fall into three categories: horizontal clearance to structures, buffer zones around foliage and property lines, and vertical clearance overhead. Get any one of them wrong and you’ve built a fire pit you can’t actually use without worry.
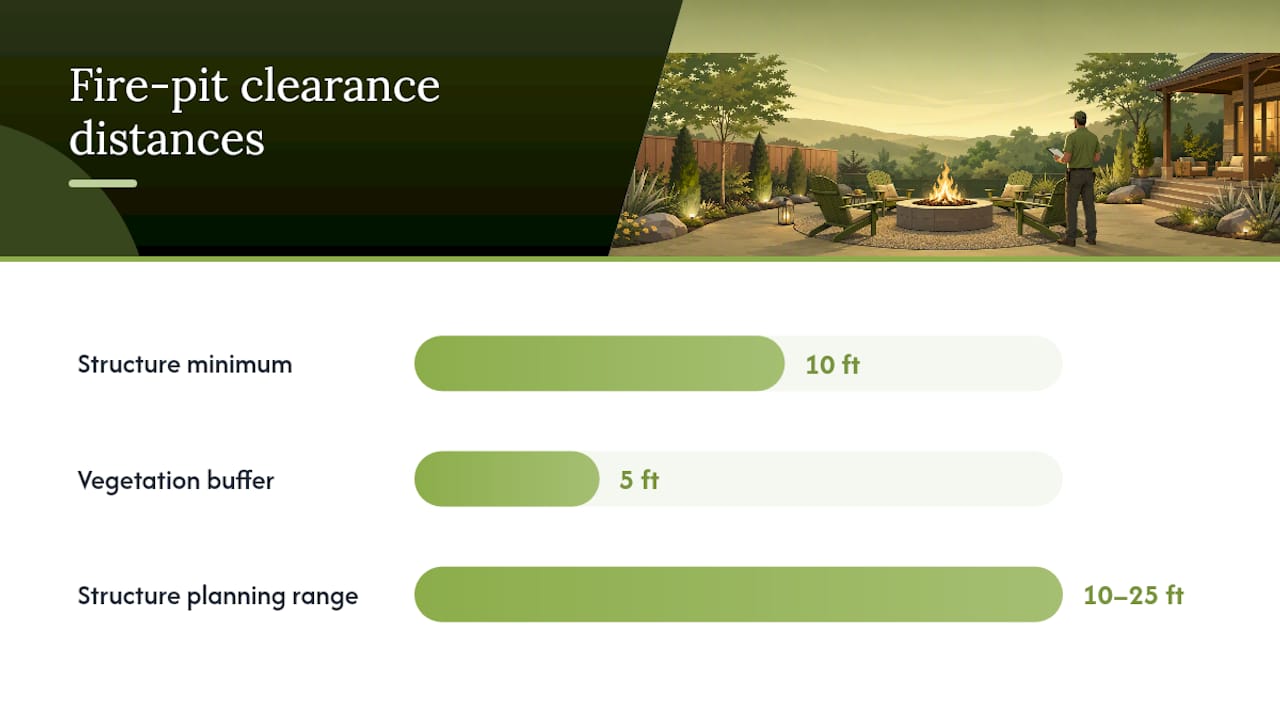
For structures, the Kansas State Fire Marshal sets a hard floor of 10 feet from any building, with combustible materials cleared at least 5 feet from the flame. That’s a minimum, not a comfortable planning number. Industry planning guides commonly push structure clearance to a 10 to 25 foot range once you factor in wood-burning embers, wind gusts, and local fire code add-ons that many municipalities layer on top of the baseline. Fences and sheds deserve the same treatment as your house. A vinyl fence six feet from a fire pit will warp or scorch long before anyone calls the fire department.
Property lines are their own animal. Most jurisdictions apply a setback requirement separate from structure clearance, and that number varies widely by city and county. Never assume your neighbor’s yard gives you extra room. Call your local building department and ask for the setback figure in writing before you finalize a spot near a shared boundary.
Overhead clearance gets ignored more than any other measurement. Wood-burning pits throw sparks upward, and a low tree branch, pergola beam, or retractable awning can catch fire pit sparks nobody saw coming. Plan for 8 to 10 feet of vertical clearance above a wood-burning pit. Gas and propane units burn cleaner and cooler, so some manufacturers approve as little as 6 feet, but that number comes from the manufacturer’s manual, not a general rule.
Here’s what to measure before you commit to a location:
- Distance from the pit’s outer edge to your house, garage, and any shed
- Distance to the nearest fence line and property boundary
- Height and reach of any branches, pergola beams, or eaves overhead
- Distance to foliage, mulch beds, and anything that could carry an ember into dry brush
Baseline safety statistic: The Kansas State Fire Marshal recommends a minimum of 10 feet from structures and 5 feet of cleared vegetation around any backyard fire pit, a figure echoed across most state and municipal fire codes as the floor, not the ceiling.
Radiant heat and ember risk aren’t the same threat, and that distinction shapes your distances. Radiant heat is the steady warmth you feel sitting near the flame. It weakens with distance in a fairly predictable way, which is why seating clearance can be tighter than structure clearance. Embers are unpredictable. A gust can carry a hot spark 15 or 20 feet before it lands in mulch or a dry lawn, which is exactly why the wider structure and foliage buffers exist.
What Base Materials Work Under a Fire Pit?
Concrete, pavers, natural stone, and compacted gravel all handle direct heat and repeated ember exposure without breaking down. Each has a slightly different personality. Concrete slabs resist heat well but can crack over years of thermal cycling if they weren’t poured with the right control joints. Pavers and natural stone like travertine spread heat stress across individual units instead of one monolithic slab, so a cracked paver is a cheap fix instead of a full tear-out. Compacted gravel drains well and works as a lower-cost temporary base, though it shifts more overtime than a set paver pad.
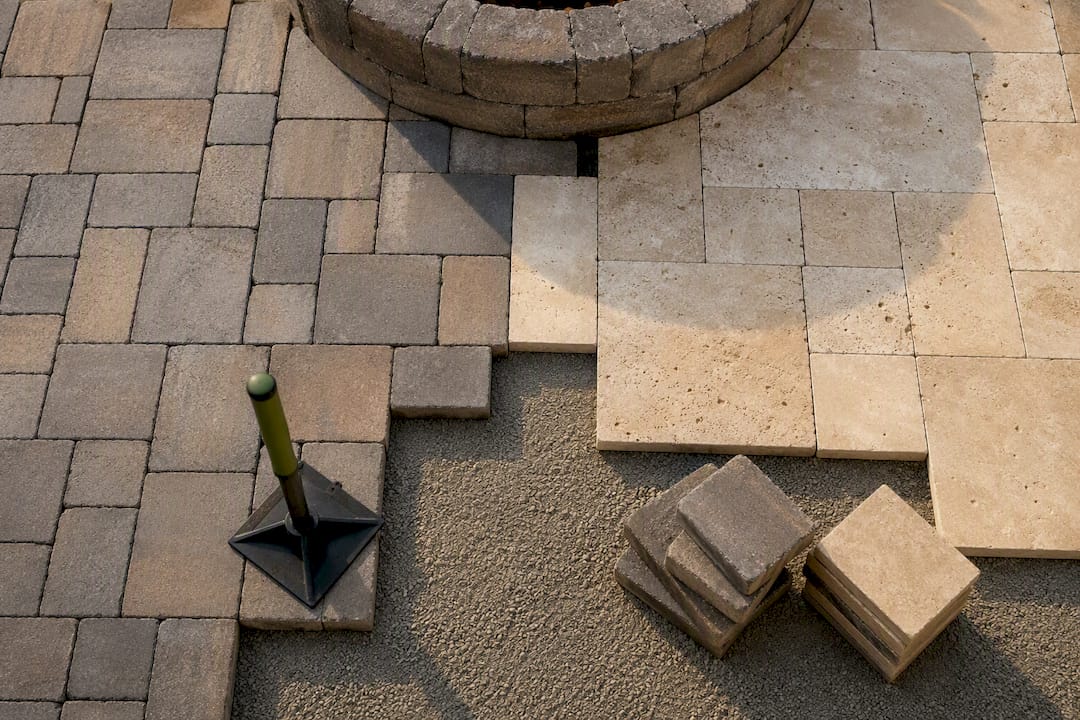
Whatever base you choose, extend it at least 3 feet beyond the pit’s outer edge. That buffer catches stray embers before they reach mulch, grass, or a wood deck, and it gives you a stable surface to set a poker or ash bucket down without digging through soil. This 3 foot ring is standard advice from fire pit safety guides and it’s the single easiest upgrade to skip when you’re rushing to finish a weekend project.
Skip grass, composite decking, and asphalt entirely as a direct base. Grass scorches and dies in a ring around the pit within a season. Composite decking can melt, warp, or catch fire depending on the brand and heat level. Asphalt softens under sustained heat and will hold a permanent depression where the pit sat. If you’re set on deck placement, HGTV’s fire pit safety guidance recommends a heat-resistant deck pad extending at least 24 inches beyond the pit, or a pedestal-style unit that lifts the heat source off the deck surface, but only when the manufacturer explicitly approves deck use.
- Concrete: durable, but needs proper control joints to resist cracking
- Pavers or natural stone: heat-tolerant and repairable unit by unit
- Compacted gravel: good drainage, lower upfront cost, more long-term shifting
- Grass, composite decking, asphalt: avoid as a direct base without manufacturer-approved protection
Pro Tip: If you’re on the fence about a permanent paver pad, ask yourself how many years you plan to stay in the house. A properly compacted paver base outlasts a gravel bed by decades and won’t need re-leveling every spring, which makes it worth the extra upfront cost for anyone staying put.
Where Should You Put a Fire Pit for Comfort and Safety?
Wind decides whether your fire pit becomes a gathering spot or a smoke machine nobody wants to sit near. The mistake most homeowners make is checking wind direction in the middle of the afternoon, then wondering why smoke rolls straight into the seating area every evening. Wind behavior shifts with time of day and terrain, and afternoon patterns rarely match what happens after sunset, according to USDA wind research. Test the actual spot at the actual hour you’ll use it.
A simple test works better than guessing: light a stick of incense or hold up a strip of paper streamer near ground level at your planned evening fire time, and watch where the smoke travels. Do this over two or three evenings if you can, since a single test can catch an unusual gust and mislead you.
Seating distance matters almost as much as wind. Keep chairs 3 to 4 feet from the pit’s outer edge for comfortable radiant heat without scorching fabric or melting plastic armrests. Behind that seating ring, leave a walking lane of at least 3 feet so people can move around the circle without stepping over legs or tripping on chair frames in the dark.
Walls, fences, and dense hedges change smoke behavior in ways that surprise people. A solid wall close to the pit can trap smoke and recirculate it back into the seating area instead of letting it disperse. A hedge or fence positioned farther back, and downwind of prevailing evening breeze, can actually work in your favor by blocking a cross breeze without trapping smoke directly overhead.
Before you build anything, mock up the layout on-site:
- Mark the pit’s proposed center point with a flag or chalk mark
- Set out actual chairs or stand-ins at your planned seating distance
- Run the smoke test at your real use time, not midday
- Adjust the pit location or seating angle based on where smoke actually drifts
- Walk the circulation path behind the seats to confirm nothing feels cramped
This mock-up costs you an evening. Skipping it costs you a fire pit nobody wants to use because the wrong spot got locked in with concrete.
Do Wood-Burning and Gas Fire Pits Need Different Placement?
Yes, and the gap is bigger than most homeowners expect. Wood-burning pits throw embers, need a wider vertical clearance, and require ash cleanup and a spark screen if you’re anywhere near dry foliage or a wood fence. Gas and propane units burn cleaner with far fewer stray sparks, which lets some manufacturers approve tighter clearances, but they trade that convenience for a different set of placement problems: fuel-line routing for built-in units, or safe, ventilated storage for a propane tank on portable models.
A propane tank needs airflow and distance from the flame source, and it should never sit somewhere it could tip, overheat, or get blocked by furniture during a gathering. If you’re running a gas line to a permanent built-in pit, that’s a job for a licensed contractor, not a weekend project, since gas work usually requires a permit and inspection regardless of jurisdiction.
Portable units give you the most flexibility. You can move a portable fire bowl or a steel ring pit around the yard for a season, testing wind and sightlines before committing to a permanent installation. That’s a smart, low-risk way to find your best spot.
- Wood-burning: needs 8 to 10 feet overhead clearance, a spark screen, and a plan for ash disposal
- Gas/propane: needs safe tank placement, ventilation, and professional line work for built-in units
- Portable: ideal for testing locations before a permanent commitment
- Built-in/permanent: typically requires permits and a contractor, especially for gas hookups
Deck placement deserves its own caution. Even a gas unit approved for deck use needs a heat-resistant pad and manufacturer sign-off; a wood-burning pit is rarely appropriate on any wood or composite deck surface, full stop.
How Do You Check Local Codes and HOA Rules Before Installing?
Two authorities govern where you can put a fire pit, and they don’t always agree. Your municipal or county fire code sets the legal minimum, and the manufacturer’s installation manual sets the product-specific requirement. When the two conflict, follow whichever is stricter for your situation, since ignoring either one can void a warranty or trigger a code violation.
Before you call your local fire or building department, run through this checklist so you get a complete answer in one conversation instead of three:
- Ask whether a permit is required for the fire pit type you’re installing (masonry, gas line, or portable)
- Ask for the exact minimum setback from structures, fences, and property lines in your zone
- Ask whether seasonal or drought-related burn bans apply to your area
- Request any written guidance document you can keep on file
- Ask if an inspection is required after installation, particularly for gas hookups
Permits typically become mandatory once you move into permanent gas lines or masonry, built-in installations, according to industry installation and code guidance. A portable fire bowl usually skips the permit process entirely, but a built-in paver-and-masonry fire feature connected to a gas line almost never does.
If you live under an HOA, treat that as a separate approval step, not a formality. Submit your placement plan, materials, and dimensions for review before you buy anything, and keep the written approval. For neighbor relations, a quick heads-up conversation about your planned fire nights avoids disputes later, especially if your yard sits close to a shared fence line.
Fire code baseline to remember: the Kansas State Fire Marshal’s 10-foot structure minimum and 5 foot vegetation clearance shows up, in some form, in most local fire codes across the country, which is why it’s the number to start your research from.
Fire Pit Placement Checklist You Can Run This Weekend
Testing a spot before you build costs you an afternoon. Skipping this step costs you a redo.
- Mark the proposed center point using flags, a garden hose laid in a circle, or chalk on a hard surface
- Measure the distance to your house, garage, fence, and property line, confirming each meets your local minimum
- Test wind and smoke drift during your actual evening use window, not midday
- Place temporary chairs at your planned seating distance and walk the circulation path behind them
- Call your local utility locator service before any digging, since underground lines can run closer to the surface than you’d expect
- Confirm your measurements against both local code and the pit manufacturer’s clearance requirements
Give yourself a tolerance of about 1 foot on structure and property line measurements. If you’re within a foot of a code minimum, move the pit farther away rather than risk a violation. Once your test setup checks every box and the spot feels right through two or three evening tests, you’re ready to move from a temporary mockup to permanent construction, or to bring in a contractor for base prep and paver installation.
Fixing the Most Common Fire Pit Placement Mistakes
- Too close to a structure or fence: move the pit, switch to a lower-ember gas unit, or widen the non-combustible buffer around it
- Smoke blowing into the seating area: reposition chairs, add a low windbreak set back a safe distance, or switch to a gas or low-smoke design
- Base settling or shifting: add compacted gravel beneath pavers, or bring in a contractor to install a properly compacted paver pad
- Overhanging branches or a nearby pergola beam: increase vertical clearance by trimming, or relocate the pit rather than gambling on a low-hanging limb
What Jackpotlandscape Sees Most Often on Installation Calls
Homeowners usually call in a professional for three reasons: a gas hookup that needs a licensed hand, drainage that’s more complicated than it looks from the surface, or genuine uncertainty about local code. All three are reasonable calls to make.
The most common fix Jackpotlandscape makes on existing installations is inadequate base compaction, poured in a single lift instead of the 2 to 3 lifts a solid paver pad actually needs. That shows up later as uneven pavers, water pooling near the pit, or a propane tank sitting on a base that’s started to tilt.
Desert climate adds its own wrinkle. Paver and travertine finishes need to handle thermal expansion and heavy UV exposure without cracking or fading, which is a different problem than what a fire pit base needs to survive in a milder climate. After 15 years installing hardscapes across Tucson and Southern Arizona, that’s the detail that separates a pad that lasts one season from one that lasts twenty.
Why Slope and Drainage Matter as Much as Distance
A fire pit sitting in a low spot in your yard will collect water after every rain or sprinkler cycle, and that water undermines whatever base you’ve built, no matter how well you compacted it. Standing water around a gravel base washes out fines and creates soft spots. Around a paver pad, it works its way into joints and accelerates shifting over a few seasons.
Look at how your yard slopes before you pick a final spot. Water should drain away from the pit in every direction, not pool against one edge. A grade of roughly 1 to 2 percent away from the pit is generally enough to keep water moving without creating a noticeable slope underfoot. If your only flat spot happens to sit in a natural low point, plan for a gravel drainage layer beneath the base or a French drain routed away from the area.
Check the spot after a heavy rain, not just on a dry day. A low point that looks fine when the ground is dry can turn into a shallow puddle within an hour of a storm, and that’s exactly the test that saves you from discovering the problem after the pavers are already set.
How Climate and Weather Shape When and Where You Build
Local climate does more than set the mood for fire pit season. It determines how often you’ll actually use the thing and what materials will survive sitting outside year round. In a desert climate, intense summer sun and 100 plus degree afternoons push most fire pit use into evening hours, when the temperature drops and the wind patterns shift compared to midday.
Humid or rainy regions face a different placement question: covered patios and pergolas offer shelter from sudden showers, but that same overhead structure cuts into your vertical clearance for a wood-burning pit. In those climates, a gas unit with a lower flame profile often fits under partial cover more safely than an open wood fire.
Seasonal wind shifts matter too. A spot that’s calm and pleasant in summer can turn into a wind tunnel once fall or winter fronts move through, funneling smoke somewhere it never went in July. If you live somewhere with distinct seasonal wind patterns, test your intended spot across more than one season if your installation timeline allows, or at least ask neighbors who’ve lived there longer how the wind behaves later in the year.
How to Light the Area Around Your Fire Pit Safely
Good lighting around a fire pit isn’t decorative extra credit. It’s what keeps someone from tripping over a low retaining wall or misjudging the distance to the pit’s edge in the dark. Low-voltage path lights along the walking lane behind seating give people a visual guide without competing with the fire’s ambiance.
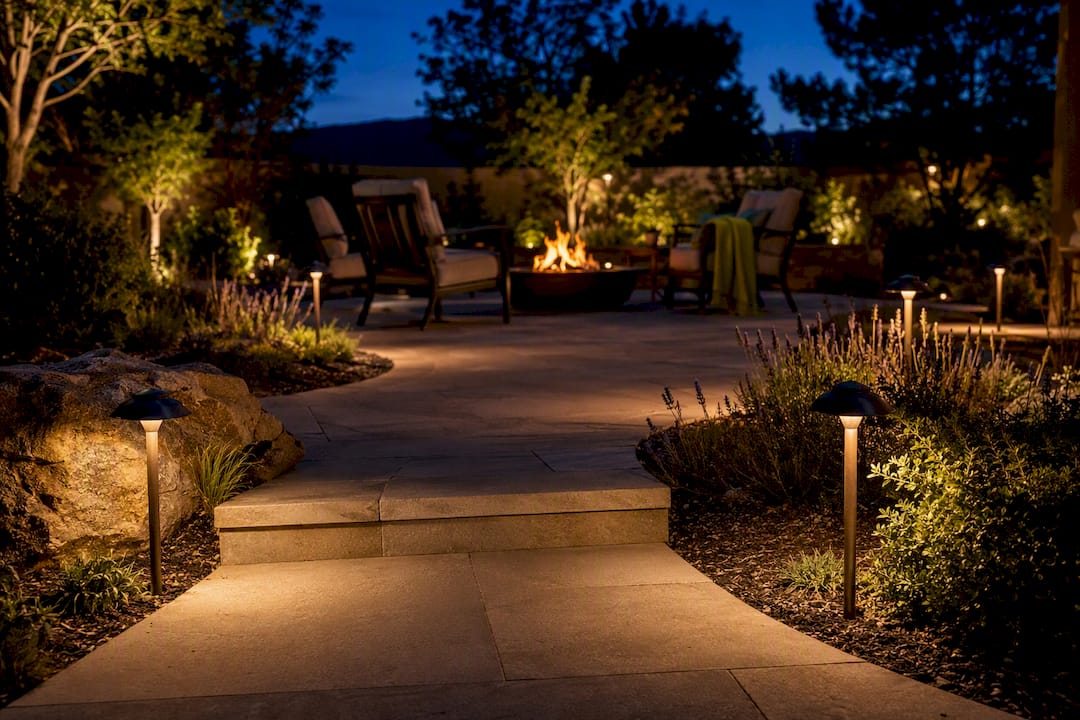
Avoid placing bright, direct lighting that shines into people’s eyes near the seating circle, since that actually reduces visibility of the ground and nearby obstacles. Softer, downward-facing fixtures along walkways and at step transitions work better than a single floodlight aimed at the whole patio.
If your fire pit sits near a pool, deck edge, or any elevation change, prioritize lighting those transition points specifically. A short retaining wall or a single step down to the patio is exactly the kind of hazard that becomes invisible once the fire pit is the brightest light source in the yard.
How to Place a Fire Pit Without Bothering Your Neighbors
Sound carries farther at night than most people expect, and a fire pit gathering with conversation, music, or laughter can travel well beyond your own property line once the neighborhood quiets down. Placing the pit closer to the center of your yard, rather than tight against a shared fence line, reduces how directly that sound reaches next door.
A fence, dense hedge, or garden wall between your seating area and a neighbor’s window does double duty: it blocks some sound and some wind at the same time. Just make sure that barrier still respects the horizontal clearance and vertical overhang rules discussed earlier, since a hedge planted too close becomes its own hazard.
A short conversation with neighbors about which nights you typically use the fire pit goes further than any physical barrier. Most disputes over backyard fire pits come from surprise, not actual noise level, and a heads-up avoids that entirely.
Which Direction Should a Fire Pit Face?
Orientation is the detail people skip because it feels minor, but it shapes every evening you spend around the pit. Position seating so the prevailing evening breeze carries smoke away from the main gathering side, not across it. That usually means orienting the pit so one side stays clear of dense structures or hedges that could funnel wind back toward your guests.
If your yard has a view worth looking at, whether that’s a garden feature, a pool, or open desert sky, angle the seating arrangement so people face that direction rather than facing directly into a fence or wall. Comfort and sightlines matter as much as the technical clearance numbers once the fire pit actually becomes a weekly gathering spot instead of a one-time weekend project.
Which Approach Actually Works: Wood, Gas, or a Professional Build?
If you want the shortest path to a fire pit you’ll actually enjoy for a decade, prioritize clearance and wind-tested placement first, then decide on fuel type second. Wood is worth the extra ash cleanup and ember management if you genuinely love the crackle and campfire smell; otherwise gas wins on low-maintenance convenience. For any permanent installation, hire a contractor once gas lines, permits, or a paver pad enter the picture, or explore outdoor living builds designed around exactly this problem.
— Noah
How Jackpotlandscape Builds Fire Pit Areas That Last
A fire pit is only as good as what’s underneath it, and that’s the part most homeowners can’t see when they’re picking a spot in the yard. Jackpotlandscape handles the paver pads, travertine surrounds, and full outdoor living builds that turn a measured, wind-tested location into a permanent feature that drains properly, resists desert heat cycling, and won’t need re-leveling three summers from now.

Where a DIY gravel base gets you a working fire pit for a season or two, a properly compacted paver installation handles the code research, base compaction in the right number of lifts, and drainage planning so water never pools around the pit edge. That’s the difference between a weekend project and a fire pit area that’s still level in ten years. If you’re ready to move from a chalk-marked test spot to a finished patio, request a quote on your paver pad or full outdoor living space and get a plan built around your yard’s actual slope, soil, and sun exposure.
Sources
- BBQ, Grilling & Backyard Fire Pits — Kansas State Fire Marshal
- Outdoor fire pit setup done right: codes, safety, and design — Build-Construct
- 10 fire pit safety rules every homeowner should know — HGTV
- Where to put a backyard fire pit — Miller Brick