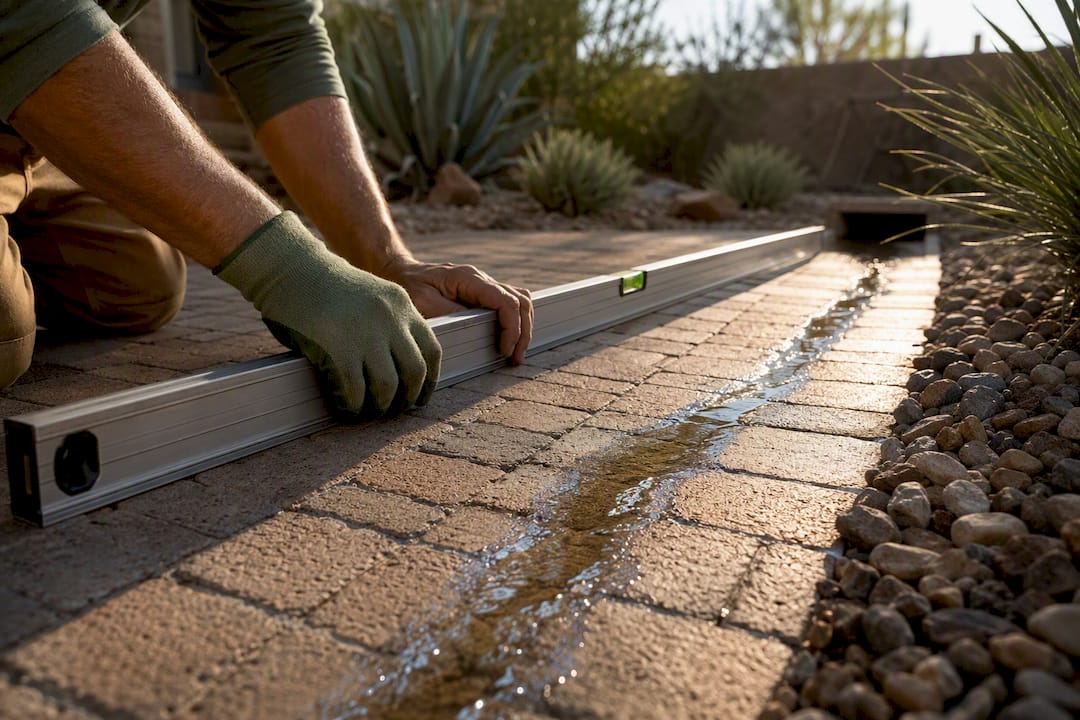
Yes, almost every paver patio needs a built-in drainage plan, especially if it sits near your house or on level ground. The fix is rarely exotic: get the slope right first, then add a channel drain, French drain, or permeable joint system based on your site. Call a professional when the patio sits close to a foundation, groundwater runs high, or you have no legal place to send the water.
TL;DR:
- Proper grade and slope, typically 1/8 to 1/4 inch per foot, are essential to prevent water pooling on a patio, especially near the house.
- Effective drainage options include channel drains, French drains, or permeable paver systems, with the outlet point planned before construction.
- Installation requires careful excavation, fabric wrapping, and proper base layering, with materials like open-graded aggregate and geotextile fabric to ensure long-term drainage.
- Common issues such as shallow bases or clogged joints can cause failures, but simple fixes include regrading, replacing joint material, or adding drainage outlets.
- Long-term maintenance involves regular sweeping, clearing grates, vacuuming joints, and using breathable sealers to preserve drainage performance.
Table of Contents
- How to Decide Fast: A Site Check Before You Touch a Shovel
- What Are Your Real Paver Patio Drainage Options?
- How Do You Install a Drainage System Under Pavers?
- What Should You Put Under Pavers for Reliable Drainage?
- Why Do Paver Patios Fail, and How Do You Fix Each Problem?
- What Maintenance Keeps Patio Drainage Working Long Term?
- What Fifteen Years of Paver Projects Taught Us About Drainage
- Get a Drainage-Aware Paver Patio Built Right the First Time
- Sources
- FAQ
How to Decide Fast: A Site Check Before You Touch a Shovel
Grab a 4 foot level or a line level and lay it across the patio surface, or use a smartphone leveling app for a rough reading. Watch where puddles form 30 minutes after a hose test or the next real rain. That tells you almost everything you need to know before you start moving stone.
- Slope is present but water still pools: the surface grade is probably fine, but a low spot or clogged joint is trapping water, so check joints and edges first.
- Patio is flat or slopes toward the house: this needs correction, not just a drain. Regrading or adding a channel drain, French drain, or permeable system is the real fix.
- Soil feels heavy, clay-like, or slow to absorb water: subsurface drainage (French drain or dry well) will matter more here than on sandy, fast-draining ground.
If you need something today, a temporary gravel channel or repositioned downspout can buy time. Redirecting a downspout that’s dumping straight onto your patio, for instance, stops active damage within minutes. Just treat these as stopgaps. Simple fixes like rerouting downspouts prevent immediate harm, but they don’t correct a bad base or missing slope, and the problem tends to come back.
What Are Your Real Paver Patio Drainage Options?
Every reliable paver patio drainage strategy starts with grade, not gadgets. Experts recommend planning the drainage layout at the design stage and routing water to the lowest point of the patio using one of three main systems: channel drains, French drains, or permeable pavers, according to drainage specialists interviewed by Homebuilding. Here’s how each one actually behaves once it’s in the ground.
- Slope and outlet planning. Aim for roughly 1/8 inch to 1/4 inch of fall per foot, moving away from your house. On a 12 foot patio, that’s 1.5 to 3 inches of total drop from the high side to the low side. Too little slope and water sits; too much and pavers can feel uneven underfoot. Before you commit to a grade, decide where the water actually goes: a storm drain tie-in, a vegetated swale, or a dry well set well away from your neighbor’s yard.
- Channel (trench) drains. These sit at low points or doorway thresholds and catch sheet flow before it reaches your foundation. They’re a common professional choice for patios built flush against a house, since they can tie directly into a downspout or municipal storm line. Grates need occasional lifting and clearing, since leaves and grit collect fast in a linear channel.
- French drains. A perforated pipe wrapped in gravel and fabric, buried below grade, pulls water sideways and down rather than across the surface. These earn their keep in enclosed courtyards or anywhere groundwater sits close to the surface, situations where a surface drain alone can’t keep up.
- Permeable paver systems. Wide-open joints filled with permeable joint stone sit above a deep open-graded aggregate base, letting rainfall soak straight through instead of running off. Permeable systems can cut stormwater runoff by 70 to 100 percent, though they need deeper excavation, often 12 to 24 inches or more, and annual joint vacuuming to stay clear.
- Dry wells and swales. These are outlets, not fixes on their own, and they carry real fine print. A dry well undersized for your roof and patio runoff will surface flood in a hard storm, and a swale aimed at a property line can trigger a dispute with your neighbor fast.
Pro Tip: Design the outlet before you design anything else. A beautifully sloped patio with nowhere for the water to legally go just moves your flooding problem ten feet closer to someone else’s yard.
How Do You Install a Drainage System Under Pavers?
Good installation is sequence discipline more than raw skill. Skip a step here and you’re re-excavating a finished patio in two years.
- Call 811 before you dig. Free utility locates catch buried lines you cannot see, and this step is not optional in most states. While you wait for markers, set your finished grade with stakes and string, and confirm your outlet point actually clears property lines.
- Excavate to depth. Traditional bases typically need 6 to 8 inches of compacted crushed stone below the paver and sand layer; permeable systems run deeper, often 12 to 24 inches, to store water until it infiltrates.
- Lay non-woven geotextile fabric. Line the excavation and run the fabric up the sides in what installers call the “stone envelope” technique, wrapping the base so fine soil particles can’t migrate up into the open-graded aggregate. Skipping this step is one of the most common reasons a base clogs and stops draining within a few years, according to pro-guide installation standards.
- Place and compact open-graded aggregate in lifts. Add stone in 2 to 4 inch layers, compacting each pass rather than dumping it all at once, which prevents voids that later show up as sinking.
- Install channel drains or perforated pipe now, not after. Set channel drains at your lowest elevation point with the grate flush to finished grade, or lay perforated French drain pipe with a slight continuous slope toward the outlet, wrapped in its own fabric sock.
- Finish with bedding sand, set pavers, and choose joint material. Compact the whole surface with a plate compactor after the pavers are down, not before, then run a hose test from the patio’s high point to the outlet and watch where the water actually goes.
A patio built with the wrong slope or a shallow base isn’t a cosmetic problem you can ignore. Fixing minor drainage issues typically runs $730 to $2,485, but a full regrade or a retrofit French drain on a severe case can run $4,000 to $14,000. Getting the base and slope right the first time is almost always cheaper than fixing it later.
What Should You Put Under Pavers for Reliable Drainage?
The materials matter as much as the layout. Get these wrong and even a perfectly sloped patio will fail early.
- Open-graded angular aggregate: typically ¾ inch to 1.5 inch crushed stone with sharp edges that lock together and leave open voids for water. Traditional bases run 6 to 8 inches deep; permeable systems need a deeper reservoir layer, often well over a foot.
- Non-woven geotextile fabric: wraps the entire stone base, overlapping seams by at least a foot and running up the excavation sides, to keep silt out of the aggregate’s drainage voids for decades.
- Joint material: permeable joint stone lets water pass through the joints and into the base below, while polymeric sand seals joints tight and sheds water across the surface instead. Use polymeric sand only on traditional, sloped-to-drain patios, never on a system meant to infiltrate, since film-forming joint fill defeats the purpose of a permeable design.
- Edge restraint and weep gaps: rigid edge restraint keeps pavers from spreading, but leave small weep gaps or drainage openings at the base of retaining edges so water can’t get trapped against the structure.
Why Do Paver Patios Fail, and How Do You Fix Each Problem?
Most drainage failures trace back to one of a handful of installer mistakes, and the fix depends entirely on which one you’re looking at.
- Flat or reverse-sloped surface: water pools instead of running off. The fix is regrading, not adding a drain on top of a bad grade.
- Shallow or under-compacted base: pavers sink unevenly in wet spots. This calls for pulling up the affected area and rebuilding the aggregate base in compacted lifts.
- Clogged or sealed joints: water sheets across the surface instead of soaking through. If joints were meant to infiltrate, swap sealed polymeric sand for permeable joint stone and vacuum the area clean.
- Eroded edges near a downspout or slope: loose soil washes out along the patio border. Add edge restraint and a proper outlet, since erosion almost always signals water arriving faster than it can leave.
Pro Tip: If only one paver has sunk, you can often lift it, add compacted bedding sand, and reset it in an afternoon. If a whole section is sinking or wobbling, that’s a base problem, and patching the surface will just fail again within a season.
What Maintenance Keeps Patio Drainage Working Long Term?
Drainage systems don’t fail overnight. They fail from small things nobody swept up.
- Monthly: sweep debris off the surface and clear grates on channel drains so leaves and grit don’t back water up at the low point.
- Seasonally, especially after storms: walk the patio right after heavy rain and look for standing water, soft or sunken spots, and soil washing out at the edges. Early puddling is the cheapest problem you’ll ever fix.
- Annually: vacuum permeable joints to pull out fine sediment that’s settled in over the year, since that’s what keeps an infiltration system actually infiltrating.
- When sealing: choose a breathable, penetrating sealer (silane or siloxane types) rather than a film-forming topical sealer. Film-forming sealers trap moisture vapor beneath the surface, which does more damage to outdoor pavers over time than leaving them unsealed.
What Fifteen Years of Paver Projects Taught Us About Drainage
Most drainage failures we see in Tucson and Southern Arizona trace back to one decision made in the first hour of a project: skipping the slope calculation because the patio “looked flat enough.” It never is. Desert soil compacts differently than clay-heavy regions, and a base that would hold up in a wetter climate can wash out fast during monsoon season if the grade wasn’t checked with a level, not a guess.
Jackpot Landscaping builds every paver patio installation around slope and base engineering first, using durable interlocking pavers suited to desert conditions rather than treating drainage as an afterthought. Our completed Tucson patio projects reflect over 15 years of solving exactly the water problems this article covers, and that pattern repeats across nearly every driveway and patio retrofit we’ve handled, including the driveway widening projects where drainage gets overlooked most often.
— Noah
Get a Drainage-Aware Paver Patio Built Right the First Time
A DIY slope correction or a weekend French drain project can solve a lot of the problems this article covers. But if your patio sits against your foundation, your soil barely drains, or you just don’t want to gamble a full base rebuild on a first attempt, that’s where a licensed installer earns the cost. A professional landscaping company typically designs patios around correct grade, engineered base depth, and the appropriate drain type for specific soil and roofline conditions, backed by workmanship suited to local weather patterns.

A site assessment typically covers a slope reading, a soil check, and a look at where your roof and yard water actually want to go, followed by a written estimate that spells out base depth and drainage components before any work starts. If you’re ready to stop patching puddles and get a patio that drains the way it’s supposed to, request a quote through the paver installation service page and get a plan built around your yard, not a generic template.
Sources
- How to get patio drainage right: Experts explain everything | Homebuilding
- 5 Patio Drainage Problems And How To Fix Them | Angi
- Paver Patio Drainage Systems: Best Options for 2026 | Vista Hardscaper
FAQ
Do You Need Drainage Under a Paver Patio?
Yes, in almost every case. Even a well-sloped patio needs an open-graded base underneath so water moves down and away instead of collecting under the pavers and undermining the base.
What Does Proper Drainage on a Paver Patio Look Like?
It looks like a consistent slope of about 1/8 inch to 1/4 inch per foot moving away from your house, a compacted open-graded stone base, and a clear outlet where water actually exits the property rather than pooling at a low point.
What Do You Put Under Pavers for Drainage?
Open-graded angular crushed stone, typically 6 to 8 inches deep for traditional patios or deeper for permeable designs, wrapped in non-woven geotextile fabric to keep soil fines from clogging the drainage voids.
How Do You Add Drainage to an Existing Paver Patio?
Common retrofits include cutting in a channel drain at the lowest point, replacing polymeric sand with permeable joint stone, or digging a French drain that routes to a dry well, all of which can be done without tearing out the whole patio in most cases.
When Should You Hire a Pro Instead of DIYing Patio Drainage?
Call a licensed installer like Jackpot Landscaping when the patio sits close to your foundation, groundwater sits high, or you’re not sure where a legal outlet point exists, since a poorly planned drainage retrofit can cost far more to fix than it would have cost to install correctly.