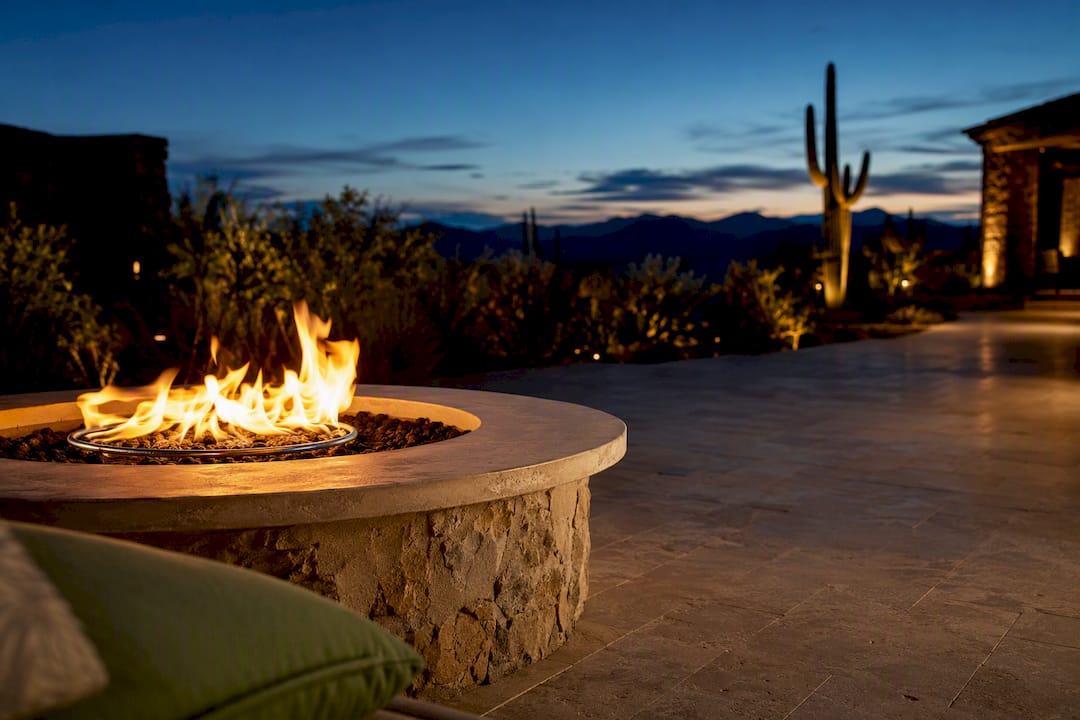
Yes, most homeowners can install a self-contained propane fire table safely if they follow the manufacturer’s manual and run a proper leak test. That covers the common tank-in-base and tank-outside-base units sold at retail. Skip DIY and call a licensed contractor the moment the job involves a hard-piped natural gas line, a buried supply, or a permanent gas riser. The safety checkpoints that matter every time: clearance from combustibles, correct ventilation, and a soap test on every fitting.
TL;DR:
- Using the manufacturer-approved regulator and hose assembly is crucial to ensure safe operation and proper manifold pressure during installation.
- Placement must adhere to at least 10 feet from combustibles and 2 to 3 feet from seating areas, with open-air locations preferred to prevent trapped heat and fumes.
- Leak testing with soap and water is mandatory before ignition, as improper connections pose significant safety risks, especially in vented or enclosed cabinets.
- DIY installation is suitable only for self-contained units with specific parts; work involving permanent gas lines or buried piping requires licensed professionals and permits.
- Regular seasonal checks and correct disposal of tanks are vital to maintain safety and care for the environment, avoiding shortcuts that can lead to hazards.
Table of Contents
- What You Need Before Starting Your Propane Fire Pit Installation
- Where Should You Place a Propane Fire Pit for Safety?
- How Do Regulators, Tanks, and Pressure Actually Work?
- How to Install a Tank-in-Base Propane Fire Pit Step by Step
- How Do You Leak Test and Light a Propane Fire Pit Safely?
- How Much Ventilation Does a Tank-in-Base Fire Pit Need?
- Seasonal Maintenance: Keeping Your Fire Pit Safe Year After Year
- When Do You Need a Permit for a Propane Fire Pit?
- Installing an Above-Ground Fire Pit With the Tank Outside the Base
- Types of Propane Fire Pits and How Their Installation Differs
- How to Safely Dispose of or Replace a Propane Tank
- Environmental Considerations and Safe Operation Tips
- Jackpot Landscaping’s On-Site Notes for Long-Lasting Fire Pit Bases
- Propane Fire Pit Installation for Homeowners: What the Guides Get Wrong
- Get a Permanent, Code-Aware Fire Feature Built Right
- Sources
- FAQ
What You Need Before Starting Your Propane Fire Pit Installation
Half the safety failures on propane fire pit installation jobs trace back to one thing: someone grabbed a part from the garage instead of the one the manual specifies. A regulator rated for the wrong pressure or a hose with the wrong connector doesn’t just void your warranty. It can leave you with an appliance that runs hot, sooty, or unsafe.
Manufacturer manuals for propane fire tables specify the exact regulator and hose assembly that ships with the unit, and that’s the only combination guaranteed to hold correct manifold pressure.
Before you touch a wrench, lay out these essentials:
- CSA or UL-approved regulator matched to your specific model (never a universal substitute)
- QCC-1 connector, the standard fitting that locks onto most 20 lb propane cylinders
- Whistle-free flex line, rated for outdoor propane use and long enough to route without kinks
- Key valve, a manual shutoff that lets you dial flame height without touching the tank valve
- Burner pan and fire-rated media (lava rock, fire glass, or ceramic logs, as specified for your burner)
- Vent kit for tank-in-base cabinets, sized to the manufacturer’s opening spec
- Bubble level, adjustable wrenches, tape measure, and a spray bottle of soapy water for the leak test
Unbox everything and check for shipping damage before assembly day. Cross-reference the parts list against the manual line by line. A missing gasket or a dented regulator housing is a five-minute fix now and a frustrating mid-install problem later.
Where Should You Place a Propane Fire Pit for Safety?
Placement decisions made in the first ten minutes determine whether your fire pit is safe to use for years or a liability you patch around forever. Concrete, pavers, and stone all handle radiant heat fine. Wood decking is a different story: even units marketed as “deck safe” benefit from a fire-rated pad underneath, since ember drift and radiant heat both degrade untreated wood over time.
The United States Fire Administration recommends keeping propane appliances well clear of structures, and the industry baseline most installation guides follow is 10 feet from combustible materials, including siding, fencing, and overhanging eaves. Seating clearance runs tighter, usually 2 to 3 feet, enough room that a stray gust doesn’t push flame toward a knee or a sleeve.
Wind matters more than most people expect. A fire table tucked against a wall to block wind can trap heat and fumes against that same wall. Open-air placement is what the USFA points to for outdoor appliances generally, and it applies just as much to a $400 tabletop unit as it does to a full outdoor fireplace.
| Placement factor | Recommended minimum | Why it matters |
|---|---|---|
| Distance from structures/combustibles | 10 ft | Radiant heat and stray embers can ignite siding, fencing, or dry vegetation |
| Distance from seating | 2 to 3 ft | Prevents heat exposure and accidental contact during use |
| Overhead clearance | No overhangs, pergola fabric, or umbrellas directly above | Trapped heat and soot buildup, plus fire risk to fabric |
| Surface type | Concrete, pavers, stone, or a fire-rated pad on decking | Withstands radiant heat without scorching or warping |
Before final assembly, set the empty base on your chosen spot and walk around it. Check sightlines from seating, confirm nothing overhangs above it, and note which direction the prevailing wind runs on a typical evening. That five-minute walk-through catches problems a tape measure alone won’t.
How Do Regulators, Tanks, and Pressure Actually Work?
A propane fire pit only runs safely within a narrow pressure window, and the regulator is what keeps it there. Tank pressure inside a 20 lb cylinder varies with temperature and swings widely, sometimes over 100 psi on a hot day. The regulator steps that down to the low manifold pressure your burner is built for, typically in the range of 4 to 11 inches of water column depending on the appliance. That’s why manuals insist on the specific regulator shipped with the unit rather than a generic replacement.
A standard 20 lb propane tank measures roughly 12 inches in diameter and 18 inches tall when full, per manufacturer installation specs. Run time depends heavily on your burner’s BTU rating and how high you run the flame. A modest tabletop burner sipping fuel on a low setting can stretch a single tank across a full evening or more; a high-output fire table cranked to maximum will drink through the same tank much faster. Retailers and installers commonly describe usable run times somewhere in the 6 to 12 hour range for typical tabletop burners, though your exact mileage depends on the burner’s draw.
A few mechanical distinctions worth knowing before you shop for parts:
- Air mixers on LP burners control how propane blends with air before combustion; they’re pre-set for propane and aren’t interchangeable with natural gas orifices.
- Natural gas conversions require swapping burner orifices to match NG’s lower pressure and different burn characteristics. This isn’t a DIY-friendly swap on most units and often requires a certified technician.
- High-BTU setups sometimes call for a two-stage regulation design, a high-pressure regulator at the tank paired with a second low-pressure regulator near the appliance, which preserves consistent pressure over longer burns. That’s a pro-level decision, not something a first-time installer should improvise.
How to Install a Tank-in-Base Propane Fire Pit Step by Step
This sequence covers the most common DIY scenario: a self-contained fire table with the propane tank hidden inside the base cabinet. Read your manual fully before starting. Every model has small variations, but the sequence below holds for the vast majority of tank-in-base units.
- Level the base first. Set the empty cabinet on its final surface and check it with a bubble level on two axes. Shim if needed; an unlevel base can pool fire media unevenly and stress joints over time.
- Confirm vent openings are clear. Tank-in-base designs rely on opposing vents for airflow. Check that nothing, no decorative panel, no storage item, blocks either opening before you go further.
- Assemble the base and tabletop per the manual’s hardware diagram. Most kits use a handful of bolts or cam locks; don’t force a misaligned panel; recheck orientation instead.
- Set the burner pan into its mounting bracket, seated flat and centered over the ignition components.
- Route the flex hose from where the tank will sit through the vent opening or designated hose channel, avoiding sharp bends or contact with metal edges that could abrade the line over months of use.
- Mount the key valve and flange at the point specified in the manual, usually on the side or back panel, so it’s reachable without opening the cabinet during use.
- Place the tank in its base compartment and connect the QCC-1 regulator fitting by hand, turning clockwise until it stops. Manufacturer documentation is consistent on this: hand-tighten the regulator nut and avoid a wrench unless your specific model calls for one.
- Attach the flex line to the key valve fitting. Hand-tighten first, then apply a quarter turn with a wrench only if the manual specifies torque. Overtightening brass fittings is one of the most common causes of leaks, not too little force.
- Run the soap test (full details in the next section) before you ever attempt ignition.
Pro Tip: When you do need a wrench on a brass fitting, use two: one to hold the fitting steady, one to turn the nut. This counter-leverage technique keeps you from twisting or deforming the softer brass, which is exactly how flare seals get damaged and start leaking months later.
Stop and call a licensed gas fitter if your project involves any of the following: a permanent gas line run from your house’s meter, a buried supply line, a gas riser or stub built above grade, or an electrically grounded ignition system tied into your home’s wiring. These aren’t DIY judgment calls. State plumbing and gas examiner boards consistently note that permanent gas appliance work falls under licensing requirements in most jurisdictions, and getting it wrong risks both safety and code violations that can complicate a future home sale.
How Do You Leak Test and Light a Propane Fire Pit Safely?
Never use a match or lighter to check for a leak. The only acceptable method is a soap-and-water test, and it takes about two minutes.
Mix a few drops of dish soap into a spray bottle of water. Spray every connection point: the regulator-to-tank fitting, the flex line couplings, and the key valve flange. Open the tank valve slowly and watch. Bubbles forming or growing at any joint mean a leak; shut the tank off immediately, retighten by hand, and retest. A joint that keeps bubbling after a retighten needs a new gasket or fitting, not more force.
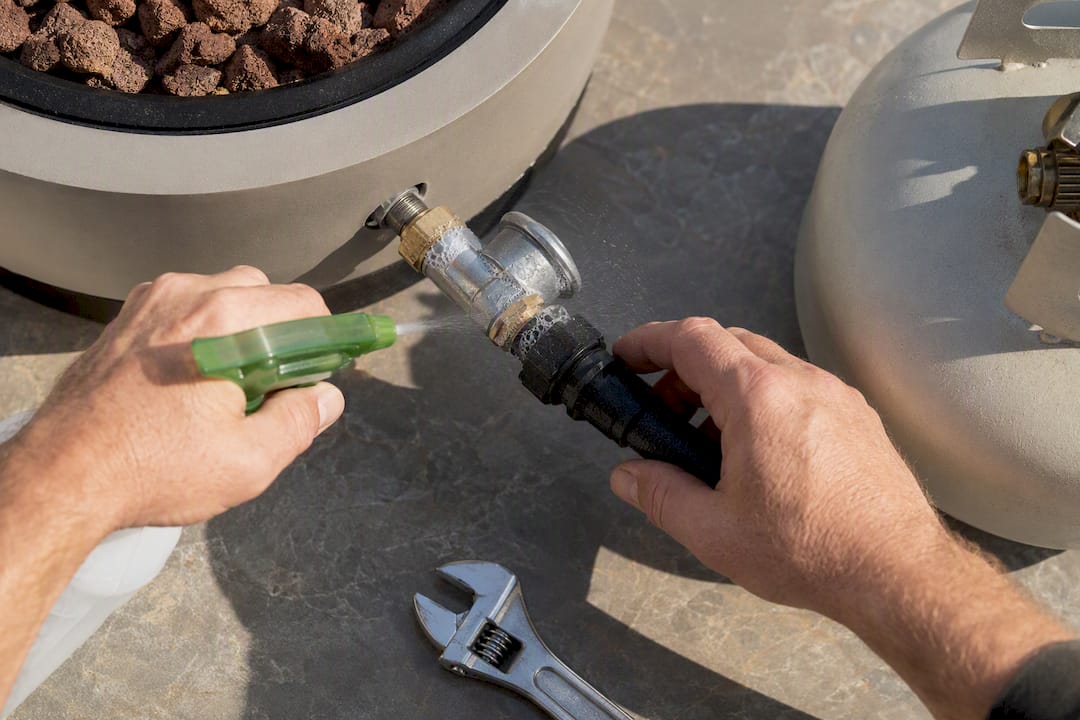
Run this test on every new connection, after swapping a tank, and at minimum once a season even if nothing has changed. Manufacturer guidance treats the soap test as mandatory after any time a connection has been opened.
Once the system passes, ignition follows a simple sequence:
- Open the tank valve fully, then open the key valve partway
- Press or turn the igniter per your model’s instructions; most spark igniters need two or three attempts
- If it doesn’t light within a few seconds, close the valves, wait a full minute to let any residual gas clear, then retry
- Never hold a lit match near the burner as a backup ignition method on a system you haven’t verified is leak-free
If the flame lights but looks wrong, the fix is usually simple. A yellow, lazy flame with visible soot points to an air-mixer that’s closed too far or blocked burner ports. A weak flame across only part of the pan often means fire media has shifted and is smothering ports on one side; redistribute it evenly and retest. Industry writeups on burner performance consistently point to uneven media coverage as the top cause of patchy flames, more common than any mechanical fault.
How Much Ventilation Does a Tank-in-Base Fire Pit Need?
Propane is heavier than air, which means any leaked gas sinks and pools instead of dispersing. A sealed cabinet housing your tank turns a minor leak into a serious hazard if there’s nowhere for that gas to escape.
Retailer installation guides commonly recommend roughly 18 square inches of vent opening per side, placed on opposing panels so air can actually cross through the compartment rather than sitting stagnant near a single opening. Measure your vent cutouts against the manual’s spec before final assembly; a decorative panel that looks fine can sometimes reduce the effective opening below what’s needed.
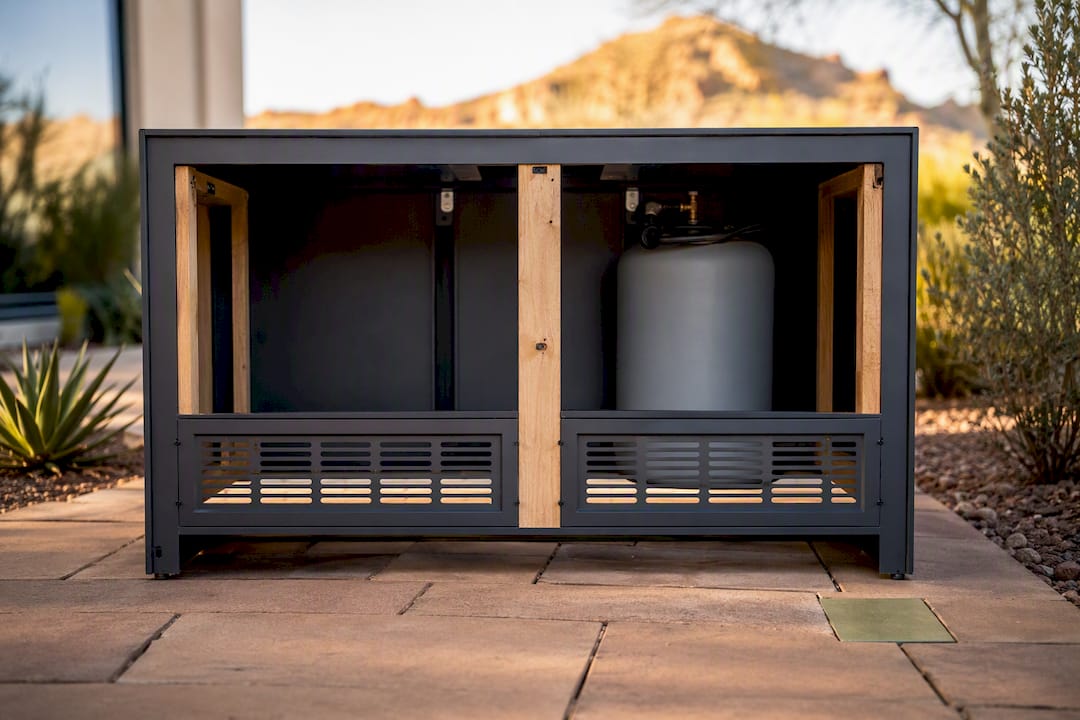
Keep the space beneath vent openings clear of storage bins, extra media bags, or anything that blocks airflow at the base. A vent that’s technically the right size but blocked by a stored propane hose accomplishes nothing.
One rule has no exceptions: never bury a propane fire pit or attempt an underground installation. Retailer safety guidance is blunt about this, warning that a below-grade cavity traps pooled propane with no path to disperse, creating real explosion risk. If you want a sunken or recessed fire feature look, that calls for a hard-piped natural gas line designed by a licensed professional, not a self-contained propane unit dropped into a hole.
Seasonal Maintenance: Keeping Your Fire Pit Safe Year After Year
A propane fire pit that sat idle all winter isn’t automatically safe to fire up in spring. Spiders love building nests inside burner tubes and orifices during the off-season, and that’s the single most common cause of a “won’t light right” call homeowners make.
Run this checklist before your first use each season and again before storing for winter:
- Inspect the flex hose for cracks, brittleness, or abrasion along its length
- Check the regulator housing for dents, corrosion, or a damaged connection thread
- Test the igniter for a strong, consistent spark
- Run the full soap test on every connection, even ones you haven’t touched
- Check fire media for even coverage and replace any that’s discolored or crumbling
- Disconnect and store the tank upright in a shaded, ventilated spot, never in a garage near an ignition source
Weak flame after a clean bill of health on the checklist usually traces back to a partially closed key valve or a tank running low. Igniter failure is often just a dead battery in electronic-spark models. A spider or debris blockage inside the burner tube calls for a pipe cleaner or compressed air, gently, and never a wire that could scratch or widen an orifice.
Pro Tip: Keep a small notebook or phone note logging the date of each leak test and tank swap. When something goes wrong months later, that log tells you exactly what’s changed since the last time everything checked out clean.
If a fix requires replacing the regulator, hose, or any gas-carrying component, order the exact part number from the manufacturer. This is not the place to improvise with a generic hardware-store substitute.
When Do You Need a Permit for a Propane Fire Pit?
Self-contained, tank-in-base or tank-outside-base propane fire tables generally don’t require a permit in most jurisdictions, since they’re portable appliances rather than fixed gas installations. That changes fast once you introduce a permanent element.
Permit triggers typically include running a hard-piped natural gas line, burying any supply piping, building a substantial permanent enclosure or fire feature tied into your home’s structure, or adding electrical grounding for a powered ignition system. Local building departments and fire marshals are the first call to confirm requirements in your area, and a licensed gas plumber can pull permits and schedule the required inspection.
Before deciding DIY versus pro, ask yourself: is this appliance portable and self-contained, does it run entirely on a swappable 20 lb tank, and does the manual cover every step you’re about to do? Three yeses generally mean DIY is appropriate. Any no points toward hiring a licensed professional.
Installing an Above-Ground Fire Pit With the Tank Outside the Base
Tank-outside-base designs, common on larger fire pit kits and DIY paver-ring builds, route the flex line from an external tank to a burner pan set inside a ring, bowl, or built structure. The core connection steps mirror the tank-in-base process: hand-tighten the QCC-1 regulator to the tank, attach the flex line to the key valve, and run the full soap test before ignition.
The differences show up in routing and protection. Since the tank sits outside any cabinet, position it on stable, level ground at least a few feet from the burner, angled away from foot traffic so no one trips over the hose. Run the flex line along a path that avoids sharp pavers or gravel edges that could abrade the line over repeated seasons, and consider a hose guard or channel where it crosses a walking surface.
Because there’s no enclosed compartment, ventilation concerns are largely moot. Open air around both the tank and burner handles that automatically. What matters more here is stability: a tank knocked over mid-burn, even secured with a shutoff, is a hazard you want to design out from the start. Some builders anchor a small enclosure or decorative screen around the tank, which is fine as long as it doesn’t seal the space, since even an external tank benefits from airflow around it in hot weather.
Clearance rules don’t change based on tank location. The same 10-foot baseline from combustibles and 2 to 3 feet from seating applies whether your tank sits inside a cabinet or beside it on the patio.
Types of Propane Fire Pits and How Their Installation Differs
Three main categories dominate the residential market, and each comes with its own installation profile.
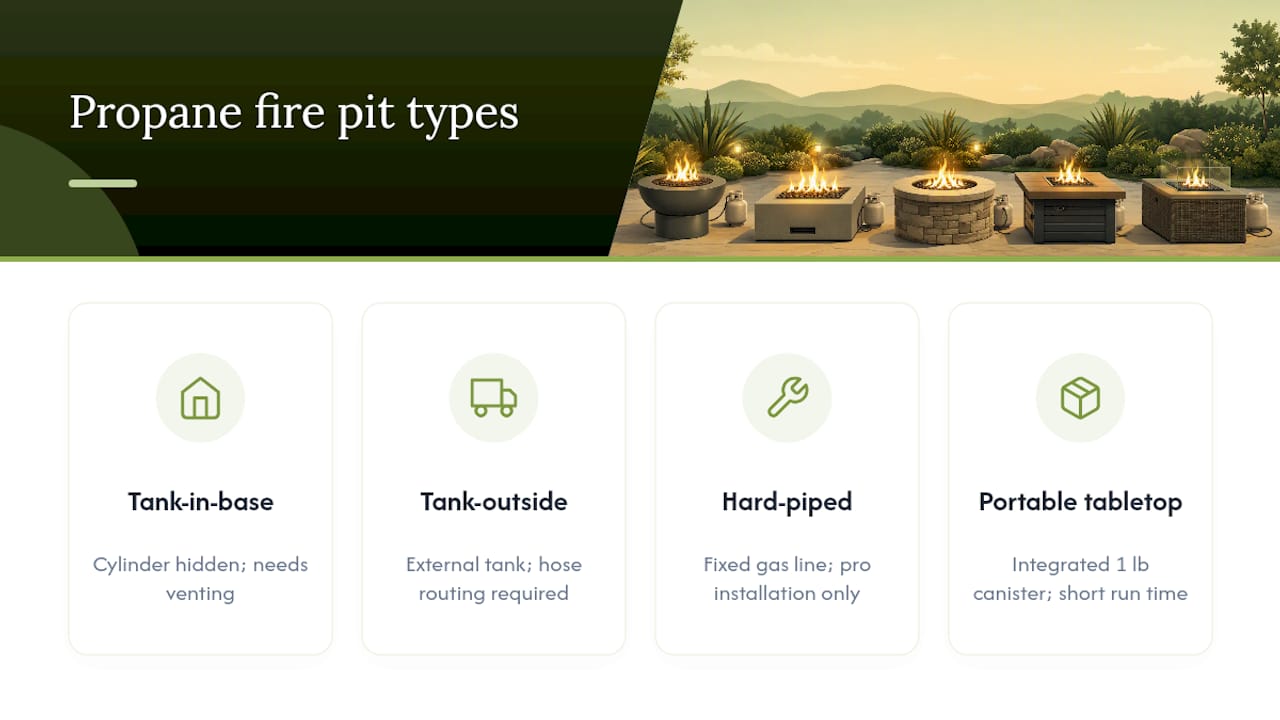
Tank-in-base fire tables hide the cylinder inside a cabinet, which looks cleaner but demands the vent sizing and airflow planning covered earlier. These are the most common retail units and the ones most manuals are written for.
Tank-outside-base fire pits, including fire rings, bowls, and custom-built paver enclosures, keep the tank separate and visible or tucked to the side. Installation is simpler in some ways since there’s no vent compartment to engineer, but hose routing and tank stability take more thought.
Hard-piped units, whether natural gas or a permanently plumbed propane line, connect to a fixed gas supply rather than a swappable tank. These deliver unlimited run time and never require a tank swap mid-party, but they’re squarely in licensed-professional territory. Any permanent line, buried piping, or connection to your home’s gas meter falls outside safe DIY scope regardless of how mechanically confident you are.
A fourth variant worth mentioning: portable tabletop units with a small integrated 1 lb canister instead of a full 20 lb tank. Installation is nearly plug-and-play, but the tradeoff is short run time, often just a few hours, making them better suited to occasional use than as a primary backyard feature.
How to Safely Dispose of or Replace a Propane Tank
Propane tanks don’t last forever, and knowing when to retire one matters as much as knowing how to connect it. Most tanks carry a stamped manufacture date and require recertification or replacement 12 years from that date, a detail easy to miss since it’s stamped into the collar rather than printed on a label.
Never throw a propane tank, empty or full, into household trash or a standard recycling bin. Most propane retailers and exchange kiosks accept old tanks for proper disposal, and many local household hazardous waste collection events do too. If a tank is dented, rusted through, or has a damaged valve, retire it immediately rather than attempting a repair; valve components aren’t user-serviceable.
For active use, tank exchange programs at hardware stores and gas stations offer the simplest swap: hand over your empty cylinder, get a filled one, no waiting. Refilling at a propane retailer often costs less per pound than exchange but takes more time and requires an in-date tank. Either way, always transport tanks upright in a well-ventilated vehicle, never in a sealed trunk, and never leave one in direct sun in a hot car.
Environmental Considerations and Safe Operation Tips
Propane burns cleaner than wood, producing far less particulate smoke and no ash to manage, which is part of why many municipalities allow propane fire features in areas under wood-burning bans during dry seasons. That said, clean-burning doesn’t mean zero-impact.
Check local air quality regulations before use, especially in drought-prone regions where any open flame device can fall under seasonal restrictions regardless of fuel type. A propane fire pit still produces carbon dioxide and consumes a fossil fuel; running it responsibly means using it deliberately rather than as background ambiance left burning unattended for hours.
Operationally, never leave a lit fire pit unattended, keep a fire extinguisher or garden hose within reach, and supervise closely around children and pets who don’t understand that fire glass or lava rock stays dangerously hot long after the flame goes out. Shut the tank valve first when extinguishing, then the key valve, letting residual gas in the line burn off naturally rather than snapping everything closed at once. That sequence also reduces the faint propane smell some users notice right after shutdown.
Jackpot Landscaping’s On-Site Notes for Long-Lasting Fire Pit Bases
A fire pit is only as stable as what it sits on. Base prep, level, well-drained, and properly compacted, keeps vents functioning as designed and reduces the maintenance headaches that come with settling or moisture intrusion around a cabinet.
Material choice matters more in desert climates than most homeowners expect. Dense pavers and travertine handle direct sun and heat cycling better than lower-grade concrete, which can crack under repeated thermal stress near a heat source.
Propane Fire Pit Installation for Homeowners: What the Guides Get Wrong
Most propane fire pit installation content treats the leak test as a footnote instead of the load-bearing safety step it actually is. It deserves top billing, not a bullet buried halfway down a listicle, because it’s the one step standing between a fine afternoon and a genuinely dangerous outcome.
The bigger blind spot is ventilation. Homeowners fixate on clearance distances, which matter, but underestimate how much a poorly vented cabinet turns a minor leak into a real hazard. If you take one thing from this guide, take the vent math seriously, not just the tape measure around the perimeter.
Where conventional advice oversells itself is the idea that any propane project is DIY-friendly with enough YouTube research. A self-contained tank swap is genuinely approachable for a careful homeowner. Anything touching a permanent gas line is a different category entirely, and no amount of confidence substitutes for a license and an inspection. Prioritize the boring stuff first: read the manual, test every joint, and know exactly where your competence ends.
— Noah
Get a Permanent, Code-Aware Fire Feature Built Right
If your project has grown beyond a swappable tank, into a hard-piped gas line, a built-in seating wall, or a full outdoor living space, that’s exactly where Jackpot Landscaping earns its keep instead of a weekend of trial and error. Jackpot Landscaping designs and builds custom outdoor living spaces across Tucson and Southern Arizona, pairing licensed subcontractors for gas and permit work with expert paver and travertine base installation that’s built to handle desert heat cycling for years, not just one season.

Choosing a pro makes sense the moment permits, natural gas lines, or structural enclosures enter the picture, exactly the line this guide draws throughout. A properly prepped paver base also solves a problem DIY installs often skip: drainage and long-term stability under a heavy fire feature. Browse recent finished projects around the region, then reach out to Jackpot Landscaping for a quote on a permanent fire feature built into your outdoor space from the ground up.
Sources
Consult your fire pit’s manufacturer manual and your local building or fire authority before installation; both carry the final word on specs and permits.
- Match-Lit Fire Pit Installation Guide (Outdoor Plus) — product manual
- United States Fire Administration — outdoor fires prevention
- Outdoor fire table setup & safety tips — Bali Outdoors (retailer guide)
- Mass
FAQ
How Long Will a 20 lb Propane Tank Last With a Fire Pit?
A standard 20 lb tank typically runs a tabletop burner for somewhere between 6 and 12 hours, depending on the burner’s BTU rating and how high you run the flame.
How Much Does It Cost to Have a Fire Pit Installed?
Cost varies widely based on whether it’s a self-contained unit versus a permanent, hard-piped feature integrated into a paver or travertine patio; a custom build handled by a professional like Jackpot Landscaping factors in materials, base prep, and any required permit work.
How Far Does a Fire Pit Have to Be From a Propane Tank?
For tank-in-base units, the tank sits inside the appliance itself; for tank-outside-base setups, keep the tank a few feet from the burner and well clear of foot traffic, while maintaining the same 10-foot clearance from combustible structures overall.
How Much Clearance Do You Need Above a Propane Fire Pit?
Keep the overhead space clear of combustible fabrics and overhangs directly above the flame, because trapped heat and soot buildup pose fire and damage risks.