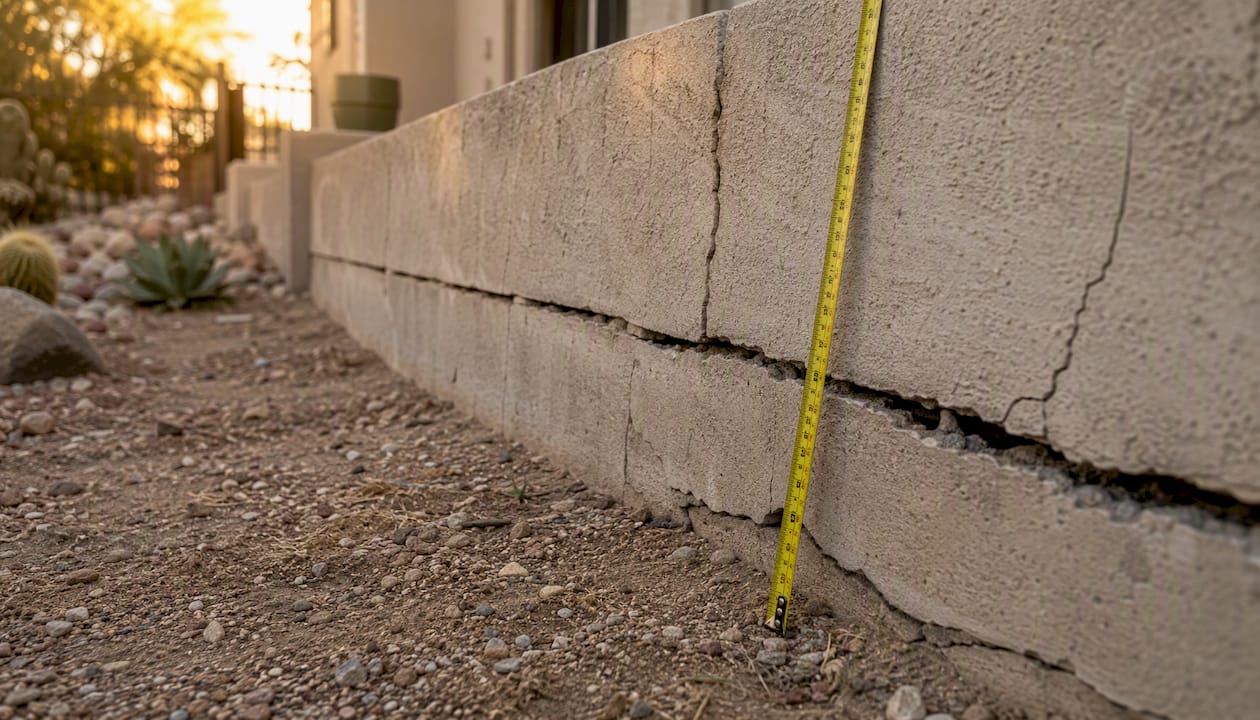
Most leaning retaining walls can be repaired if the cause is poor drainage or localized settlement. If the lean runs the full wall length, the foundation has failed, or you’re seeing large structural cracks, replacement is the more likely outcome. Either way, your first move right now is to stop water from reaching the wall. Redirect any sprinklers, downspouts, or surface runoff away from the base immediately. Then rope off the area so no one walks near it, and take photos from a fixed point so you have a baseline to compare against.
Emergency signs that require you to act now, not later:
- Sudden new movement after rain (the wall visibly shifted overnight)
- Large cracks opening across the face or base, especially horizontal ones
- Soil washing out from behind or beneath the wall
- Visible outward bulging at mid-height
- Any audible cracking or groaning sounds
If you see any of these, treat the area as a hazard zone. Keep people and pets away and call a contractor or structural engineer before doing anything else.
Pro Tip: Take your first photos before the next rain event. Wet conditions often make cracks and gaps look worse than they are, and a dry-day baseline photo is the most useful thing you can hand a contractor.
Key Takeaways
A leaning retaining wall is repairable when the cause is drainage failure or localized settlement, but whole-wall lean or foundation failure almost always means replacement is the more durable and cost-effective path.
| Point | Details |
|---|---|
| Stop water first | Redirect irrigation and runoff away from the wall before any other step. |
| Document and measure | Log tilt in inches per foot; a lean over 1/2" per foot warrants professional assessment. |
| Know the 30–40% rule | When lean or bulging affects more than 30–40% of the wall, a full rebuild is usually more cost-effective than repair. |
| DIY boundary at 3 feet | Drainage clearing and cap resets are DIY-appropriate under 3 feet; anything taller or load-bearing needs a contractor. |
| Jackpotlandscape for local help | Jackpotlandscape offers inspections, drainage repairs, and engineered rebuilds across Tucson and Southern Arizona. |
Table of Contents
- How do you assess a leaning retaining wall safely?
- What causes a retaining wall to lean in the first place?
- What are your repair options for a leaning retaining wall?
- How much does retaining wall repair cost in the U.S.?
- When should you call a structural engineer or contractor?
- How do you prevent a retaining wall from leaning again?
- Jackpotlandscape handles retaining wall inspections and rebuilds in Tucson
- What installers see most often: the mistakes that cost homeowners twice
- Sources
How do you assess a leaning retaining wall safely?
Early warning signs often show up gradually: small cracks widening over weeks, water pooling behind the wall after rain, uneven or bulging surfaces, and soil eroding at the base. Catching these early saves money. Here’s how to document what you’re seeing in a repeatable, useful way.
Step-by-step inspection process:
- Stand at a safe distance (at least 6 feet from the wall face) and photograph the full wall length from both ends and the center. Use the same spot each time you check.
- Measure the height of the wall at the tallest point, the total length of the affected section, and the horizontal offset at the top versus the bottom. A tape measure and a plumb bob or string line work fine.
- Note the tilt in inches per foot of height. A wall that leans 1 inch over a 4-foot height is leaning at 1/4 inch per foot. Local safety guidance recommends treating specific tilt thresholds as a prompt to seek professional assessment.
- Check the base for gaps between the bottom course and the soil, and look for any separation between the wall and adjacent structures (steps, fences, grade changes).
- Sketch a simple plan view showing where the lean is worst, where water pools, and where any cracks are located. Label each crack by approximate width (hairline, 1/4", 1/2"+).
- Log the date, weather conditions, and measurements. Repeat after the next heavy rain to see if anything changed.
What to look for during your inspection:
- Horizontal cracks (the most serious type, indicating bending stress)
- Vertical cracks at corners or joints (often settlement-related)
- Gaps opening at the base or cap
- Weep holes that are blocked or absent
- Vegetation growing in joints (roots accelerate cracking)
- Soil staining on the face (sign of water moving through the wall)
Pro Tip: A free smartphone inclinometer app (search “inclinometer” in your app store) can give you a degree reading directly from the wall face. It won’t replace a professional survey, but it gives you a consistent number to track over time.
A lean of more than 1/2 inch per foot of wall height, or more than 2 inches total, is a threshold worth taking seriously. At that point, the wall is past the range of minor monitoring and into territory where a professional opinion is warranted.
What causes a retaining wall to lean in the first place?
Most wall failures have one root cause: water. Specifically, water that has nowhere to go.
Hydrostatic pressure and drainage failure
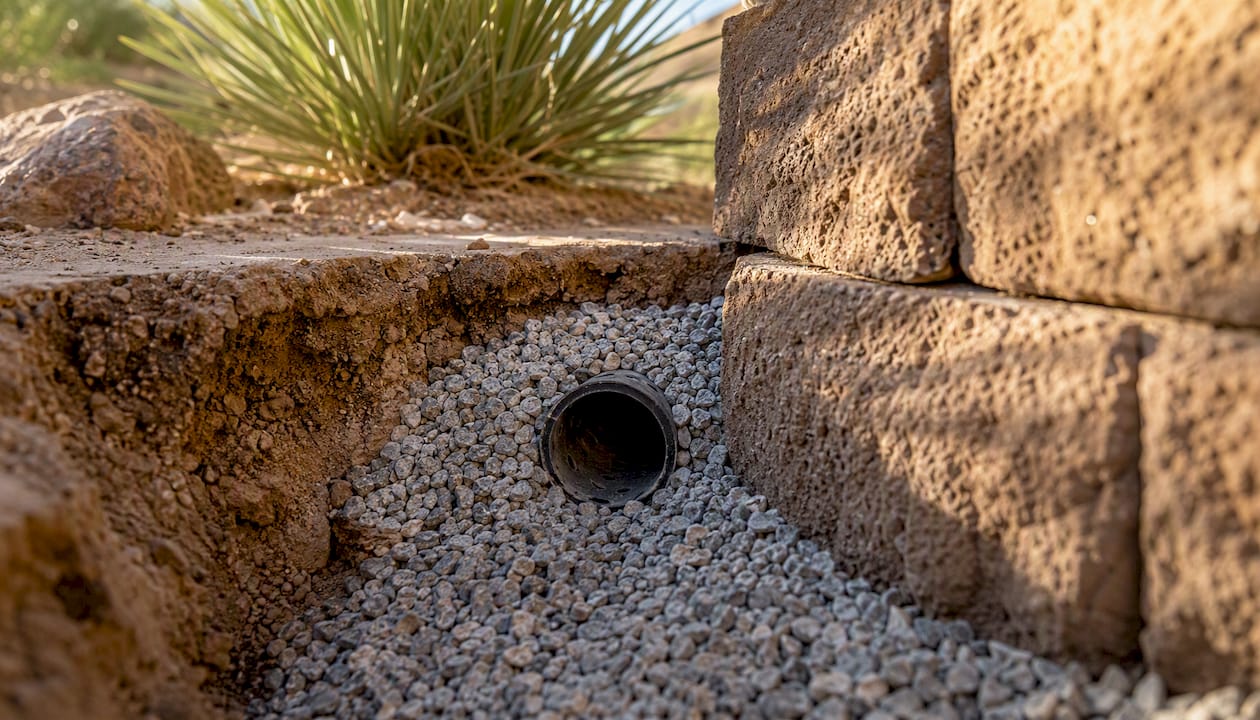
When water saturates the soil behind a wall and has no outlet, it builds pressure against the wall face. Drainage failures and hydrostatic pressure are among the leading causes of wall lean, and addressing them early often makes repair feasible without full replacement. A wall without a proper drainage chimney (gravel backfill plus a perforated pipe at the base) is essentially holding back a wet sponge that gets heavier every time it rains.
Poor foundation and inadequate embedment
A wall that wasn’t buried deep enough at the base, or was set on uncompacted soil, will eventually kick out at the bottom. The first course of block should be embedded below finished grade and set on at least 6 inches of compacted crushed stone. Skipping this step is common in older DIY builds and is a frequent cause of lower-course failure.
Surcharge loads
Parking a vehicle near the top of a wall, adding a heavy planter, or building a structure close to the retained edge all increase the lateral load the wall must resist. Walls are designed for a specific soil load. Adding weight above them without engineering review pushes them past their design limit.
Freeze-thaw cycles and root uplift
In climates with hard winters, water in the soil behind the wall freezes and expands, pushing the wall outward incrementally each season. Tree roots near the base can do the same thing more slowly. Clay soils are particularly prone to both problems because they hold more water and swell more dramatically than sandy soils.
Site changes that redirect water
New irrigation systems, regraded driveways, added impervious surfaces, or nearby construction can all change where water flows on your property. A wall that handled drainage fine for ten years can start leaning within a season if a new downspout extension now dumps water directly behind it.
Blocked or missing drainage is the single most common cause of retaining wall failure. Before spending money on structural repairs, confirm the drainage chimney is clear and functional. If it isn’t, fixing the face without fixing the drainage will fail again within a few years.
What are your repair options for a leaning retaining wall?
A practical classification divides failures into four categories: cosmetic damage, localized settlement, drainage-driven lean, and structural failure. The category determines the repair path.
Repair options from least to most involved:
-
Clear or add drainage (DIY-appropriate for walls under 3 feet): Unblock existing weep holes with a wire or drill. Add a perforated PVC pipe at the base if none exists, surrounded by 3/4" angular crushed stone and wrapped in filter fabric. Regrade the surface behind the wall to direct runoff away. This is the right first step for any wall showing lean caused by water.
-
Reset cap blocks and repoint mortar (DIY-appropriate): For walls where only the top course has shifted, remove the cap blocks, clean the surface, and reset with masonry adhesive. Use a torpedo level to confirm alignment. This is cosmetic unless the lower courses are also moving.
-
Partial dismantle and drainage chimney rebuild (contractor-level): When the drainage layer behind the wall is clogged with silt or was never installed correctly, the wall section needs to come down, the backfill excavated, and a proper drainage chimney built. A lasting repair requires 3/4" angular crushed stone for the drainage zone, filter fabric to prevent siltation, a perforated pipe at the base, and properly compacted backfill. Reusing saturated native soil as backfill is a documented cause of re-failure.
-
Geogrid reinforcement added during rebuild (contractor-level): For walls over 3 feet, geogrid layers embedded in the backfill at specified intervals dramatically increase resistance to lateral pressure. Geogrid spacing and design vary with wall height and soil type; walls over roughly 3.3 feet typically require professional design input.
-
Anchor systems and structural reinforcement (professional only): Helical anchors or deadman anchors driven into stable soil behind the wall can stabilize a leaning wall without full teardown. On confined sites where excavation isn’t practical, engineered stabilization using epoxy repair and CFRP (carbon fiber reinforcement) has successfully stabilized severely cracked or leaning concrete walls when designed and installed by specialists.
-
Full tearout and engineered rebuild (professional only): When the foundation has failed, the wall is out of plumb along its full length, or the lean exceeds safe thresholds, a complete rebuild is the only durable solution. This involves full excavation, a compacted crushed stone base, proper embedment of the first course, geogrid at specified intervals, and a functional drainage chimney from base to surface.
Temporary stabilization while you wait for repairs:
- Redirect all surface runoff and irrigation away from the wall immediately
- Place sandbags at the base (not against the face) to slow soil erosion
- Do not stack materials against the wall or add any load above it
- Mark the area with stakes and rope or construction fencing
Do not attempt to brace a leaning wall by pushing against the face. Applying force to an already-stressed wall can trigger sudden collapse. Temporary stabilization means removing loads and water, not adding counter-pressure.
DIY vs. professional boundaries at a glance:
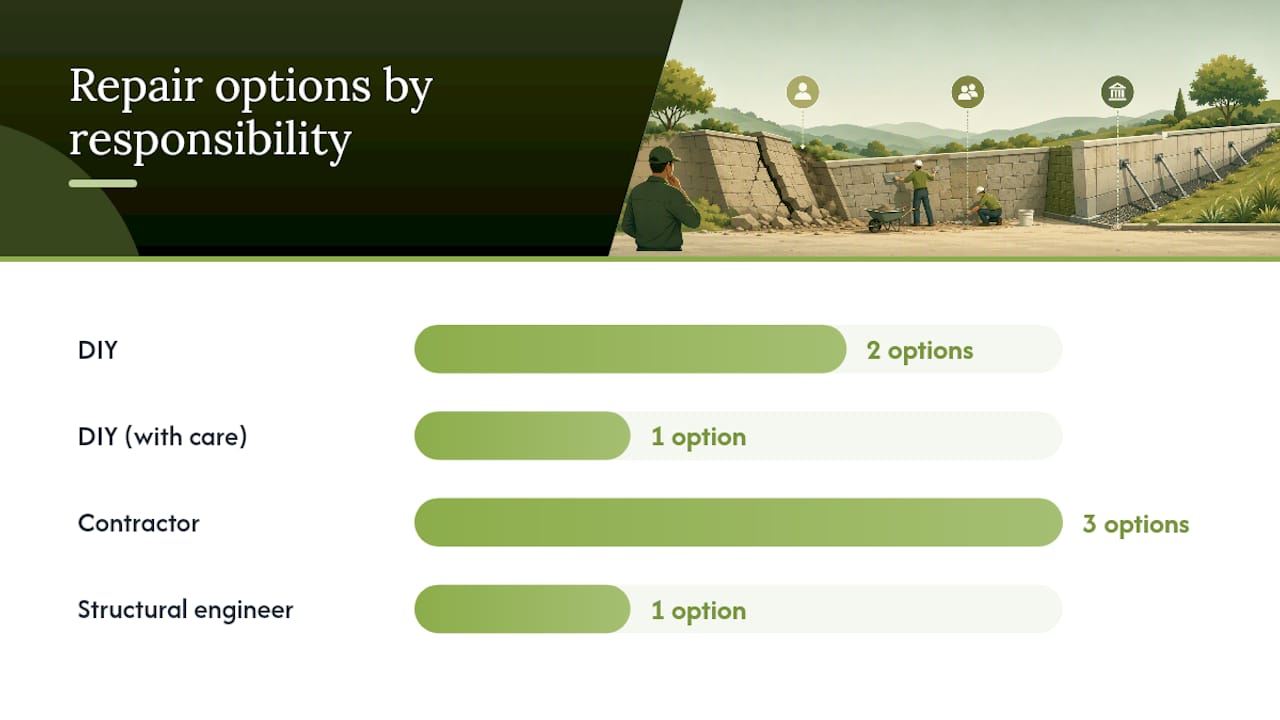
| Repair type | Wall height | DIY or pro? |
|---|---|---|
| Clear weep holes, regrade surface | Any | DIY |
| Reset cap blocks, repoint mortar | Under 3 ft | DIY |
| Add perforated drain pipe and gravel | Under 3 ft | DIY with care |
| Partial dismantle and drainage rebuild | Over 3 ft | Contractor |
| Geogrid reinforcement | Over 3 ft | Contractor + design |
| Anchor systems, CFRP reinforcement | Any | Structural engineer |
| Full rebuild | Any | Contractor + permit |
Pro Tip: When in doubt about whether a repair is DIY-safe, ask yourself: what happens if this wall falls while I’m working on it? For anything over 3 feet or anything holding back a driveway, house foundation drainage, or slope, the answer makes the decision for you.
How much does retaining wall repair cost in the U.S.?
Costs vary widely based on wall height, material, access, and whether the fix is a drainage patch or a full rebuild. Here are realistic U.S. ranges:
Primary cost drivers:
- Wall height and total length of affected section
- Ease of equipment access (tight side yards cost more)
- Whether engineered drawings and permits are required
- Soil disposal and replacement material costs
- Landscape restoration after the work (sod, plants, irrigation repair)
Typical U.S. cost ranges:
Permits add time and cost. In most U.S. jurisdictions, walls over 4 feet (measured from the bottom of the footing) require a building permit and, often, engineered drawings. Budget 2–4 weeks for permit approval in addition to construction time.
When leaning or bulging affects more than around 30–40% of a wall, replacement is commonly recommended. At that point, mobilization costs for a repair approach what a full rebuild costs, and a rebuild delivers a longer-lasting result with a warranty.
Pro Tip: Get at least two contractor quotes and ask each one to specify what drainage system they’re installing. A quote that doesn’t mention a drainage chimney is a quote for a repair that will fail again.
When should you call a structural engineer or contractor?
Some situations don’t leave room for a wait-and-see approach.
Call a professional immediately if you observe:
- Active outward movement after rain (the wall moved since yesterday)
- New horizontal cracks across the wall face, especially mid-height
- Soil washing out from behind or beneath the base
- A lean that has visibly worsened over days, not months
- The wall is over 4 feet tall and leaning at all
Numeric thresholds worth knowing:
A lean exceeding 1/2 inch per foot of wall height, or a total offset greater than 2 inches, is a threshold at which professional assessment is warranted. These aren’t absolute collapse predictors, but they indicate the wall is past the range of minor self-correction.
Contractor vs. structural engineer: who do you call first?
- For walls under 4 feet with localized lean and no signs of active movement, a licensed masonry or landscape contractor can assess and quote the repair.
- For walls over 4 feet, walls supporting a structure (driveway, building, slope), or walls showing active movement, call a structural engineer first. They provide a stamped assessment and, if needed, engineered drawings required for a permit.
- If you’re unsure, call a contractor first and ask directly: “Does this need an engineer?” A good contractor will tell you honestly.
What to prepare before the pro arrives:
- Your photo log with dates and weather conditions
- Your measurements (height, lean in inches, length of affected section)
- Notes on any recent site changes: new irrigation, construction nearby, added planters, recent storms
- Any previous repair history you know about
Pro Tip: When you call for quotes, mention the wall height, what’s above it (driveway, yard, slope), and how long you’ve noticed the lean. That information cuts the first visit from an hour to 20 minutes.
How do you prevent a retaining wall from leaning again?
Prevention comes down to two things: drainage and load management. Get both right and most walls last decades without significant movement.
Core design practices that prevent lean:
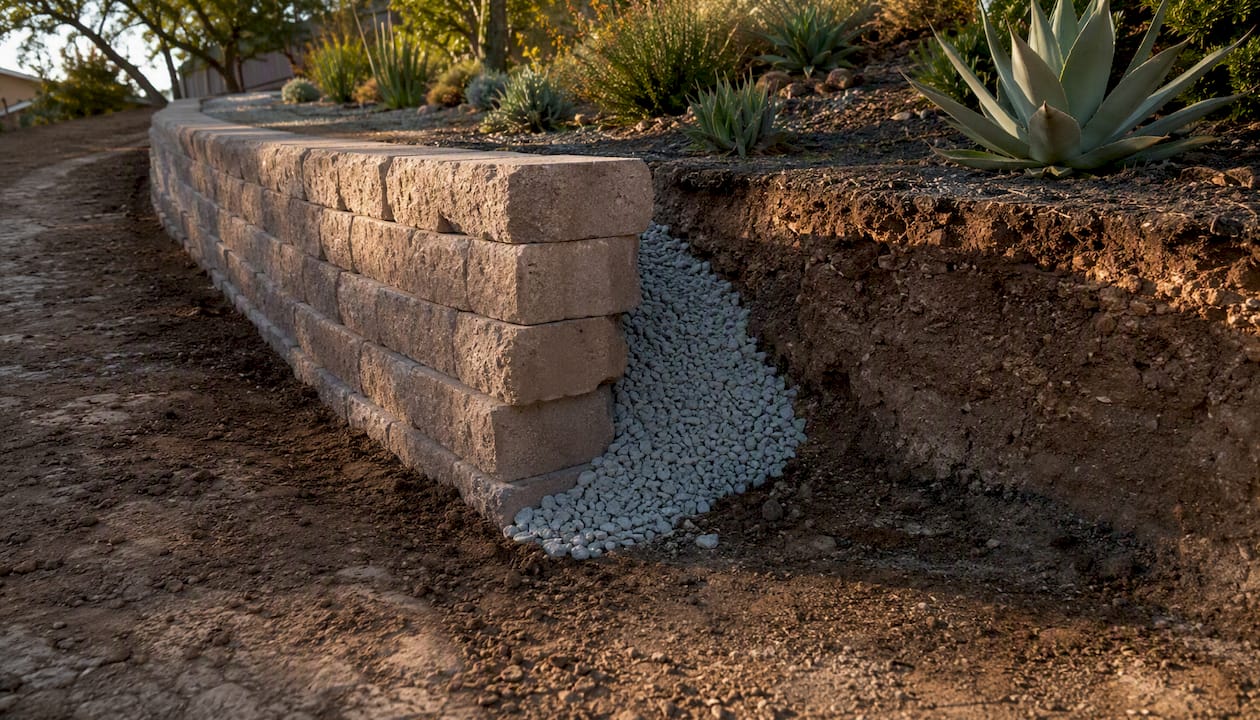
- Install a drainage chimney of 3/4" angular crushed stone the full height of the wall, wrapped in filter fabric, with a perforated pipe at the base daylighting to a safe outlet
- Set the first course below finished grade on at least 6 inches of compacted crushed stone
- Build in a slight backward lean (batter) of about 1 inch per foot of height for gravity walls
- Use geogrid reinforcement at specified intervals for walls over 3 feet
- Keep irrigation heads and downspouts pointed away from the wall face
Seasonal maintenance checklist:
- After every significant rain: check that weep holes are flowing and no soil is washing out at the base.
- Spring: inspect the full wall face for new cracks or shifted blocks; clear any vegetation growing in joints.
- Fall (before wet season): confirm the drainage outlet is clear and unobstructed; regrade any settled backfill behind the wall.
- Annually: take a fresh set of photos from your fixed reference points and compare to your baseline. Log any changes in tilt measurement.
- After any nearby construction or major storm: do a full inspection using your checklist from the assessment section.
Monitoring schedule:
Check the wall visually after every rain event that drops more than 1 inch. Do a full measurement check (tilt, base gap, crack widths) twice a year: once in spring and once in fall. If you notice any measurement change between checks, shorten the interval to monthly until you understand whether the movement is ongoing or has stabilized.
Pro Tip: Mark a small horizontal line in pencil or chalk at the top of a fixed reference block, then measure from that mark to a stake in the ground each season. It takes 30 seconds and gives you a clear record of whether the wall is moving.
Jackpotlandscape handles retaining wall inspections and rebuilds in Tucson
Retaining wall problems in Southern Arizona have a specific character: desert soils shift differently than clay-heavy soils in wetter climates, monsoon season delivers intense short-duration rain events that overwhelm poorly drained walls fast, and access on hillside lots in areas like the Catalina Foothills can make standard repair approaches impractical.

Jackpotlandscape has been building and repairing retaining walls across Tucson and Southern Arizona for over 15 years. The team handles the full range: drainage inspections, partial repairs, engineered rebuilds with geogrid and proper embedment, and full landscape restoration after the work is done. You can see an example of a completed retaining wall project in the Catalina Foothills and browse the broader project gallery to get a sense of the scope of work the team takes on.
When you call, expect a site visit where the crew photographs the wall, takes measurements, checks the drainage system, and gives you a clear repair-versus-rebuild recommendation with a written estimate. Permit assistance is included when the project requires it. The full range of landscaping and hardscape services covers everything from the wall itself to restoring the yard around it once the structural work is complete.
Request your inspection and estimate at Jackpotlandscape.
What installers see most often: the mistakes that cost homeowners twice
The most common pattern in retaining wall repair calls is a wall that was already repaired once, usually within the last three to five years, and is leaning again. Almost every time, the previous repair addressed the face of the wall without touching the drainage chimney behind it.
Contractors frequently see face repairs attempted without addressing clogged drainage chimneys. The face looks fine for a season or two, then hydrostatic pressure builds again and the wall moves. The homeowner paid for a repair that bought them two rainy seasons. That’s not a repair; it’s a delay.
The second most common mistake is reusing the native soil that came out of the excavation as backfill. Saturated clay or silty soil compacts poorly, holds water, and transfers lateral pressure directly to the wall. Proper backfill is 3/4" angular crushed stone in the drainage zone, with compacted clean fill behind it.
The third mistake is underestimating access and staging costs. A wall on a steep side yard with no vehicle access can cost two to three times as much to repair as an identical wall on a flat open lot, simply because of the labor involved in moving materials by hand.
If your budget is limited, prioritize in this order: stop water from reaching the wall first (regrading, redirecting irrigation), then fix the drainage chimney, then address structural reinforcement. Spending money in the wrong order is how homeowners end up paying twice.
Sources
The following references were used to build this guide and are worth bookmarking to share with a contractor or structural engineer during an inspection.
- Can a Leaning Retaining Wall Be Repaired or Does It Need Replacement?
- Rapidrepair
- Retaining Wall Repair vs Replace 2026 Ontario | Seven Stones
- Retaining Wall Repair vs. Replacement: How to Decide
- Safe Garden Walls