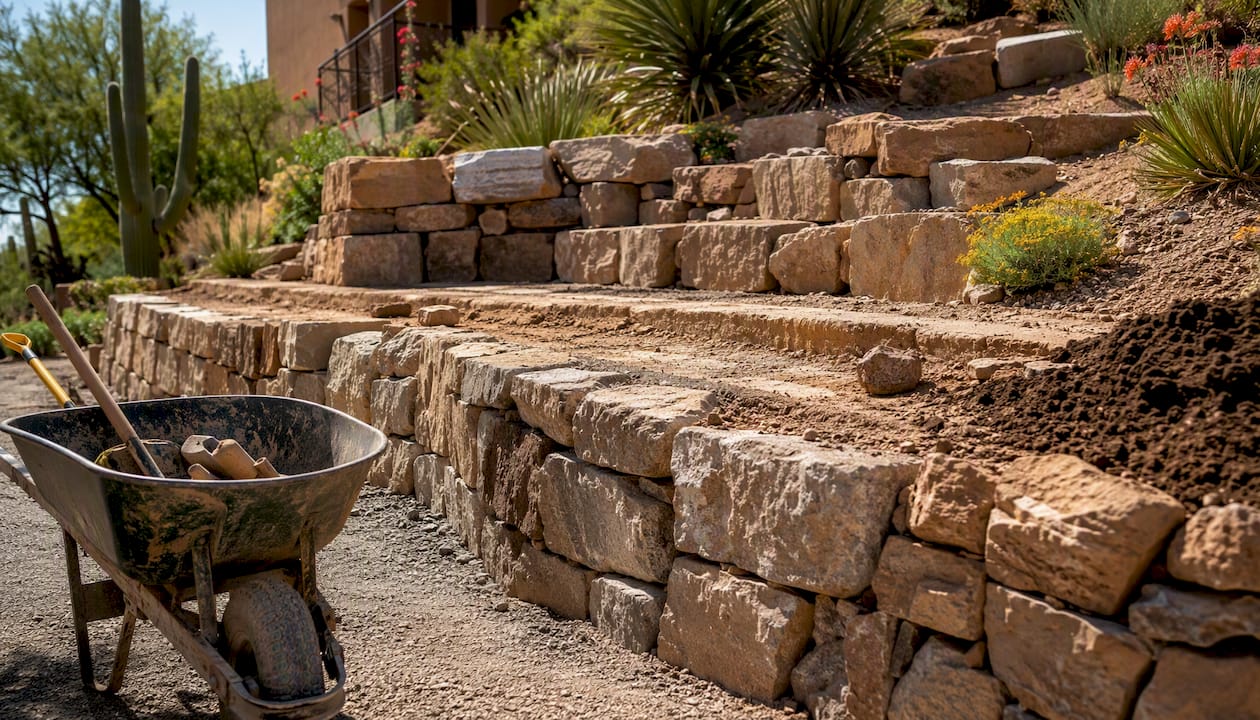
A terraced retaining wall breaks a tall slope into a series of shorter walls with flat benches between them, instead of one towering structure holding back the whole hillside. If your slope needed a single wall taller than your local height limit, or if you want the hillside to actually do something for you like hold plants or a seating area, terracing is usually the better call than one massive wall.
The one-sentence verdict: design the layout and check the numbers yourself, but hand off structural sign off (global stability analysis, geogrid sizing, and footing engineering) to a licensed professional the moment your tiers get close together or your total retained height climbs.
Terracing tends to make sense in three situations:
- Your slope is steep enough that a single wall would blow past your city or county’s maximum wall height, triggering permits and engineering you’d rather avoid.
- You want usable, plantable benches instead of a blank concrete or block face running the length of your yard.
- You’re worried about how a 10 or 12 foot wall will look and feel from your patio, and you’d rather break that mass into two or three human-scaled steps.
Even a modest backyard project touches on real engineering concepts: a compacted crushed stone footing under every course, geogrid reinforcement when tiers sit close together, and a stability check that treats the whole hillside as one connected system rather than a stack of unrelated walls.
Key Takeaways
Terraced retaining walls succeed when tier spacing follows the 2× rule, every level gets independent drainage, and a licensed professional signs off the moment tiers interact structurally.
| Point | Details |
|---|---|
| Measure slope and height first | Confirm your total rise and run before choosing between one wall or multiple tiers. |
| Check the 2× spacing rule | Keep tiers at least twice the lower wall’s height apart, or expect surcharge and added reinforcement. |
| Give every tier its own drainage | Never share a single drain pipe or gravel zone between two walls. |
| Call an engineer when tiers interact | Three or more tiers, tight spacing, or nearby surcharge loads mean a global stability check, not a rule of thumb. |
| Get at least two contractor quotes | Compare licensing, insurance, warranty terms, and past projects like Jackpotlandscape’s retaining wall work before signing. |
Table of Contents
- Why Terraced Retaining Walls Solve Real Slope Problems
- Materials and Wall Types for Stepped Retaining Walls
- Design Rules Every Terrace Layout Should Follow
- Drainage and Structural Basics You Can’t Skip
- How to Build a Small Terraced Retaining Wall Yourself
- When a Terraced Wall Needs an Engineer, Not Just a Contractor
- Maintenance, Lifespan, and Warning Signs of Trouble
- What Drives Terraced Retaining Wall Costs and Timelines
- Design Ideas That Make Terraces Beautiful, Not Just Functional
- Permits and Safety Rules You Need to Check First
- Assessing Your Slope and Soil Before You Design Anything
- Surface Water Management Beyond the Basic Drain Pipe
- Working Safely With Tools During DIY Construction
- Our Take: Local Experience Building Terraces Across Southern Arizona
- Get a Terraced Retaining Wall Estimate From a Local Team
- Frequently Asked Questions
- Sources
Why Terraced Retaining Walls Solve Real Slope Problems
Terraced walls break a large slope into a series of smaller benches. That does three things a single tall wall can’t: it slows water runoff across the site, it reduces erosion by shortening the distance water has to travel before it hits a flat spot, and it hands you usable, level ground instead of one hard vertical drop. A single 10-foot wall gives you a cliff. Three 3 to 4 foot walls with benches between them give you a cliff, a garden bed, another garden bed, and a patio.
The practical upside shows up fastest in water management. Instead of runoff sheeting down an unbroken slope and carving channels as it goes, each bench intercepts flow and gives it somewhere to soak in or drain off in a controlled way. That’s a meaningful erosion control tactic on its own, before you’ve even planted anything.
Terracing also tends to keep individual wall heights under the thresholds that trigger stricter permitting in a lot of jurisdictions. A single 8-foot wall might require an engineer stamp and a full permit review. Two 4 foot walls, properly spaced, can sometimes stay under those same thresholds. That’s not a guarantee, and you still need to confirm it locally, but it’s a real reason terracing gets chosen over one tall wall even when a single wall would technically fit the lot.
Statistic callout: A properly spaced tiered system routes water through multiple catch points instead of one, which is a large part of why terraced designs outperform a single tall wall for erosion control on sites with heavy seasonal rain or irrigation runoff.
Materials and Wall Types for Stepped Retaining Walls
Not every retaining wall material behaves the same way once you stack it into tiers. Some drain freely on their own. Others need a dedicated pipe and gravel system behind every course. Here’s how the common options stack up for a terraced project.
| Material | Drainage behavior | DIY feasibility | Best fit |
|---|---|---|---|
| Segmental (modular) block | Needs gravel backfill and a drain pipe behind the wall | High for short tiers | Most residential terraces, clean lines, wide color/texture range |
| Gabion baskets | Highly permeable; often needs no separate drain pipe if detailed correctly | Moderate, heavy to move | Sites with tricky drainage, industrial or naturalistic look |
| Rockery / boulder walls | Relies on through-drainage and filter fabric between stones | Low to moderate, needs equipment for large stones | Natural aesthetic, sites where large stone is locally available |
| Cast-in-place concrete | Needs engineered drainage and weep holes | Low, contractor territory | Tall walls, tight spaces, modern aesthetic |
| Wood (timber) | Poor long-term drainage tolerance, rots against wet backfill | High initially, low long-term value | Not recommended for permanent terraces |
Segmental block, often called SRW (segmental retaining wall) block, is the practical default for most homeowners tackling a DIY terrace. It’s engineered with a built-in setback so each course leans slightly back into the hill as you stack it, and it typically sits on a compacted crushed-rock footing, often buried about 12 inches deep. Gabion baskets work well when you want something that drains almost on its own, since wire cages filled with stone are highly permeable and can skip a separate drain pipe if the detailing is right. Rockeries look the most natural but depend entirely on getting the through-drainage and fabric placement correct, which is harder to verify once the stones are stacked.
Wood shows up constantly in older yards and in cheap DIY tutorials, and it’s worth being direct about this: skip it. Timber retaining walls rot against wet backfill, and a terraced system means multiple wood walls failing on the same timeline. If budget is the concern, a short segmental block tier costs more up front but lasts decades longer.
Design Rules Every Terrace Layout Should Follow
Contractors and engineers lean on a handful of heuristics to check whether a tiered layout will actually behave the way the drawing suggests. You don’t need an engineering degree to use them, but you do need to know they exist before you approve a design or start digging.
- The 2× spacing rule: when the horizontal distance between an upper wall and a lower wall is at least twice the height of the lower wall, the two walls can usually be designed independently. Closer than that, and the upper wall’s load reaches the lower wall as surcharge.
- The bench-width rule: a terrace’s bench should be at least as wide as the lower wall is tall. A 3-foot lower wall wants at least a 3-foot bench above it, both for usability and to keep surcharge manageable.
- Zone of influence check: sketch a line running back into the slope at roughly 45 degrees plus half your soil’s internal friction angle from the base of the upper wall. If that line crosses into the reinforced zone of the lower wall, the two tiers are interacting structurally.
- The 1/3 rule: a rough guide some designers use to check that no single tier’s reinforced soil zone eats into more than about a third of the bench width available for the tier above it.
Pro Tip: If your site has more than two tiers, any surcharge load like a driveway or pool deck, or soil that’s anything other than well-draining native material, stop trusting rules of thumb. That’s exactly the scenario where global stability analysis earns its cost, because it evaluates the whole hillside as one system instead of each wall in isolation.
Standard guidance from agencies like the Federal Highway Administration directly addresses two-tier systems, but research out of the Center for Transportation Research found that guidance doesn’t automatically extend to systems with three, four, or more tiers. More tiers usually means longer geogrid, deeper reinforced zones, and a genuine slope stability calculation, not just repeating the same detail up the hill.
Drainage and Structural Basics You Can’t Skip
Every single tier in a terraced system needs its own complete drainage package. Not a shared pipe, not a hope that water finds its way out somewhere. Each wall needs a compacted crushed-stone footing, a zone of clean drainage gravel behind the blocks, a perforated drain pipe at the base, filter fabric to keep soil fines from clogging the gravel, and a clear path for that pipe to daylight or connect to a drainage system.
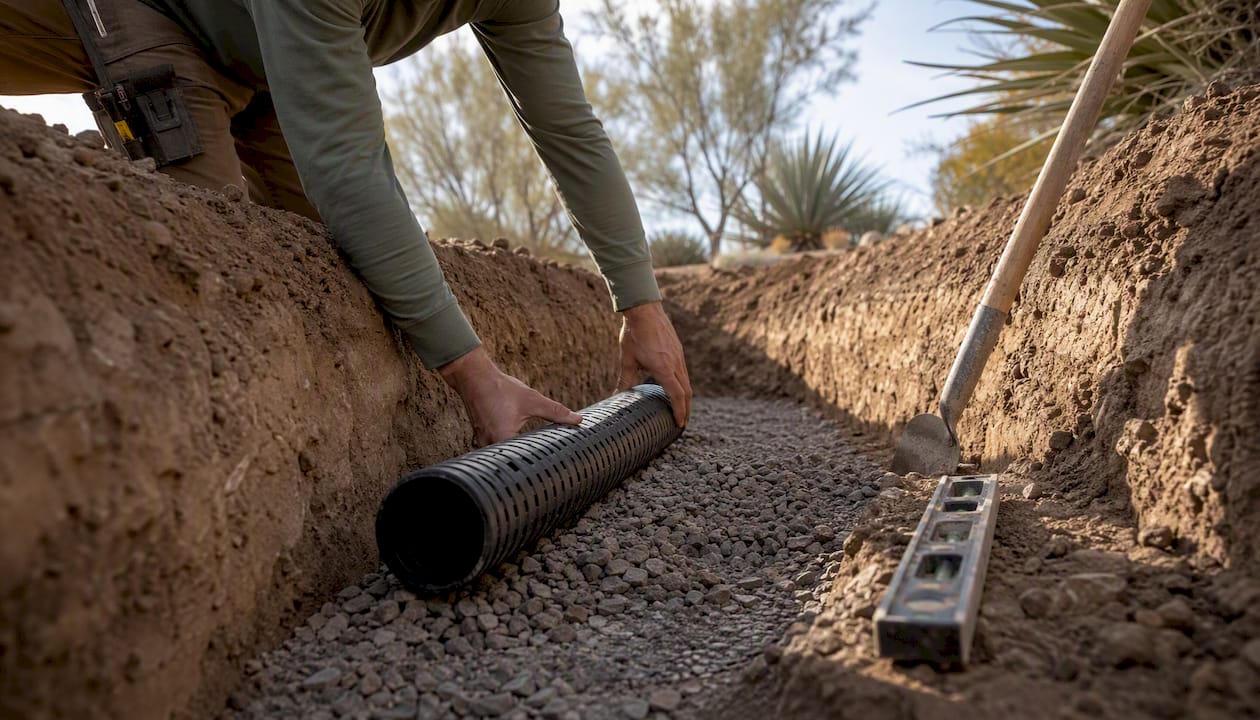
Here’s why this matters more with terraces than with a single wall: water that isn’t captured by the drainage plane behind an upper wall doesn’t just disappear. It moves downhill and loads up the backfill behind your lower wall, right where you least want extra hydrostatic pressure. A wall designed to resist soil pressure alone can fail fast when it’s also fighting water pressure it was never built to handle.
Statistic callout: Failing to give each tier independent drainage is one of the most commonly cited causes of terraced-wall failure, and it’s almost always traceable to a single shared pipe or gravel zone that was never designed to serve two walls at once.
The common DIY mistake here is efficiency thinking: one drain pipe, one gravel trench, running behind both tiers to save time and material. It looks fine for a season or two. Then a heavy rain saturates the shared backfill, the lower wall’s drainage plane can’t keep up, and you get bulging or leaning that shows up months after the “efficient” install, not during it.
How to Build a Small Terraced Retaining Wall Yourself
For short tiers, well within your local height limits, on dry, stable soil with no surcharge nearby, building your own terrace is a realistic weekend-to-week project. Here’s the sequence.
- Measure and lay out the slope. Mark where each tier’s wall face will sit, and confirm the spacing between tiers against the 2× rule before you dig anything.
- Excavate and compact the base. Dig a level trench for the first course, then compact the subgrade with a plate compactor. Skipping compaction here is the single most common reason DIY walls settle unevenly.
- Set the leveling pad. Add a compacted gravel base roughly 4 to 8 inches deep, screeded level, for the first course to sit on.
- Bury the first course. Most segmental block systems want the bottom course partially or fully below grade for stability.
- Stack courses and backfill in lifts. Add each course, then backfill with drainage gravel in layers, compacting as you go rather than dumping it all at once.
- Install the drain pipe. Lay a perforated pipe at the base of the drainage zone, sloped toward a daylight outlet, wrapped or paired with filter fabric to keep soil out.
- Repeat for each tier, maintaining bench width and spacing as you move up the slope.
- Cap, finish, and plant. Add capstones, then finish benches with soil suited to what you’re planting.
Tools and materials checklist: plate compactor (rentable), hand tamper, level, string line, shovels, wheelbarrow, crushed gravel, drainage gravel, perforated pipe, filter fabric, and your block or stone of choice.
The scope limit is straightforward: this workflow is reasonable for short, code-compliant tiers on dry ground with no nearby structures or surcharge. The moment your combined tier height trips a local combined-height rule, your soil is anything other than well-draining, or a driveway, pool, or foundation sits near the top of the slope, that’s your signal to call in an engineer before you pour a single bag of gravel.
When a Terraced Wall Needs an Engineer, Not Just a Contractor
Global stability analysis looks at the entire hillside, not one wall at a time. Practitioners commonly run Bishop or Modified Bishop method calculations to model potential failure surfaces that cut through multiple tiers at once, which is exactly the kind of failure a wall-by-wall design check can miss entirely.
Industry technical bulletins for segmental wall systems consistently note that tiers closer than the 2:1 spacing ratio transfer load from the upper wall directly onto the lower wall’s reinforced zone, meaning the lower wall has to be designed to handle a surcharge it wouldn’t face if it were freestanding.
A qualified engineer or geotechnical consultant on a multi-tier project will typically run a soil test to confirm bearing capacity and drainage characteristics, calculate factor-of-safety numbers for both individual walls and the combined slope, size geogrid reinforcement lengths, design the full drainage system, and lay out a construction sequence that protects lower tiers while upper tiers are being built.
Statistic callout: Two-tier design guidance from agencies like FHWA is well established, but research shows it doesn’t automatically extend to systems with three or more tiers, which is why a three-tier backyard project often needs its own site-specific stability check rather than a repeated two-tier detail.
Before you hire anyone, ask for a current contractor license, proof of liability insurance, references from at least two completed retaining wall projects, and a written warranty on both materials and labor. A contractor who can’t produce those on request isn’t the one for a project involving retained soil above your patio or foundation. For homeowners researching what a full-service retaining wall install looks like, Jackpotlandscape’s retaining wall installation work in Tucson covers exactly this kind of tiered, drainage-critical build.
Maintenance, Lifespan, and Warning Signs of Trouble
A well-built terraced wall is low-maintenance, not zero-maintenance. Plan on an annual walk-through: clear debris from drain outlets, top up gravel where erosion has exposed the backfill, check for any leaning or bulging along the wall face, keep aggressive root systems away from the reinforced zone, and inspect closely after any unusually heavy storm.
Lifespan varies a lot by material. Segmental block and cast-in-place concrete walls, built correctly, commonly last 50 years or more. Gabion baskets typically run 30 to 50 years, with the wire cage usually wearing out before the stone fill does. Rockeries can last decades if the through-drainage was detailed properly at construction, since the stones themselves don’t degrade. Timber sits at the bottom of the list at roughly 10 to 20 years, and often less in wet climates, because wood in constant contact with damp backfill rots from the inside before you see it from the face.
Watch for these signs and treat them as urgent:
- Sudden or accelerating lean in the wall face, especially after rain.
- New cracks in block, mortar, or capstones.
- Visible bulging partway up the wall.
- Water seeping from the face where it shouldn’t, or backfill that stays saturated long after rain stops.
- Gaps opening between the wall and the soil behind it.
Any of those warrant a professional assessment quickly, not a wait-and-see approach. A leaning wall rarely fixes itself, and catching it early is a lot cheaper than rebuilding after a full collapse.
What Drives Terraced Retaining Wall Costs and Timelines
Material choice is usually the biggest line item, followed closely by total wall height and length, since both drive how much block, stone, or concrete you need and how much reinforcement the design calls for. After that:
- Geogrid and reinforcement add cost fast once tiers get close together or walls climb past a few feet.
- Engineered design work (soil testing, stability analysis, stamped drawings) is a real expense on multi-tier projects but a small fraction of the cost of a failed wall.
- Drainage materials including pipe, gravel, and fabric add up across multiple tiers, since each one needs its own complete system.
- Excavation and site access matter a lot; a backyard that a mini excavator can’t reach means more hand labor and more time.
- Grading and compaction at each bench level takes real time, especially on uneven native soil.
A typical residential terraced project runs through site prep and layout first, then the lower wall gets built and backfilled before work moves to the next tier up, repeating that sequence tier by tier, and finishing with capstones and planting. For a two or three tier backyard project, that sequence commonly spans one to three weeks depending on access and weather, not counting any permit or engineering review time.
Permits and engineering sign off can add real waiting time before a shovel ever hits the ground, particularly if your jurisdiction requires stamped drawings for combined-tier heights. Building that lead time into your schedule up front avoids a lot of frustration later.
Design Ideas That Make Terraces Beautiful, Not Just Functional
The best terraced yards treat each bench as its own small design opportunity, not just a structural necessity. In arid climates, drought-tolerant plants like agave, penstemon, and ornamental grasses handle bench conditions well and their root systems help knit the soil together on each level, adding a layer of stability beyond what the wall itself provides.
A few features worth building in from the start:
- Integrated steps connecting tiers, so the terrace reads as one connected space instead of separate walled-off levels.
- In-wall planters built into the block face itself for cascading plants that soften the hard lines of the wall.
- Capstones in a contrasting color or texture to define each tier visually.
- Low-voltage lighting along steps and bench edges for safety and evening use.
- Hardscape integration, tying terraces into paver paths or patios so the whole yard reads as one design rather than a wall project with a yard attached.
Pro Tip: In desert climates, pairing drought-tolerant planting with hardscape rather than turf on upper benches cuts irrigation demand significantly, since those benches drain fast and dry out faster than flat ground. Projects like Jackpotlandscape’s travertine pool deck installation in Marana show how terrace benches can connect directly into a broader hardscape plan rather than sitting as an isolated feature.
Permits and Safety Rules You Need to Check First
Most jurisdictions set a single-wall height threshold, often somewhere between 3 and 4 feet, above which you need a permit and often an engineer’s stamp. Combined-height rules matter just as much for terraces: if your tiers sit closer than the local minimum spacing, some codes treat the whole stack as one wall for permitting purposes, even though it’s visually two or three separate structures. Surcharge loads nearby, a driveway, a pool, a structure’s foundation, can also push a project into permit territory regardless of individual wall height. Confirm every one of these thresholds with your local permitting office before you finalize a design; requirements vary enough between cities and counties that assuming your neighbor’s project rules apply to yours is a real risk.
On-site safety during DIY construction deserves the same seriousness as the structural rules. Never undermine a lower tier’s footing while excavating for an upper one; work bottom to tier, top last. Wear eye protection and gloves when cutting block, use hearing protection around a plate compactor, and never work alone in a trench deeper than a few feet without someone nearby. If you’re unsure whether your project needs a permit or an engineer, the safest move is a quick call to your local building department before you start digging.
Assessing Your Slope and Soil Before You Design Anything
Slope angle and soil type together decide whether terracing is even feasible on your site, and this step gets skipped more often than any other in DIY planning. A slope steeper than roughly 2:1 (horizontal to vertical) starts pushing toward the upper limit of what terracing alone can safely manage without significant engineering, since the steeper the natural grade, the less room you have between tiers to satisfy the 2× spacing rule.
Soil type changes everything about how a terrace behaves. Sandy, well-draining soils are generally the easiest to work with because water moves through them predictably and drainage systems perform close to how they’re designed. Clay-heavy soils hold water longer, swell and shrink with moisture changes, and put more lateral pressure on a wall than the same design would face in sandy ground. If your yard has visible clay, standing water after rain, or a history of slope movement, that’s a strong signal to get a soil assessment before finalizing any terrace design, DIY or professional.
A simple test any homeowner can run: dig a hole about a foot deep, fill it with water, and see how long it takes to drain. Fast drainage suggests sandy or loamy soil that’s terrace-friendly. Water sitting for hours points toward clay content that changes your drainage design and possibly your wall spacing.
Surface Water Management Beyond the Basic Drain Pipe
A drain pipe behind each tier handles water that gets into the backfill, but managing where surface water goes before it ever reaches the wall matters just as much. Grading the ground above your top tier so it sheds water away from the slope, rather than toward it, reduces the total volume your drainage system has to process.
Swales, shallow, grass-lined channels cut across the slope, can intercept runoff before it reaches your terraces and redirect it to a safe discharge point. On larger properties, a French drain running along the top of the slope captures water before it ever becomes the retaining wall’s problem. Combining terraces with erosion-control matting on exposed soil during the construction phase also keeps bare slopes from washing out before plants get established on the benches.
Downspouts and roof runoff deserve particular attention. Water dumped directly at the top of a terraced slope from a gutter downspout can overwhelm even a well-built drainage system over time. Redirecting that flow to a separate drainage line, away from the retaining wall system entirely, is one of the simplest and most overlooked ways to extend a terrace’s lifespan.
Working Safely With Tools During DIY Construction
Building even a modest terrace involves tools that deserve real respect: plate compactors, masonry saws, and hand tools that can cause serious injury when used carelessly. Wear safety glasses or goggles whenever you’re cutting block or stone, since flying chips are a real risk with both wet and dry saws. Gloves rated for masonry work protect your hands from sharp edges on freshly cut block.
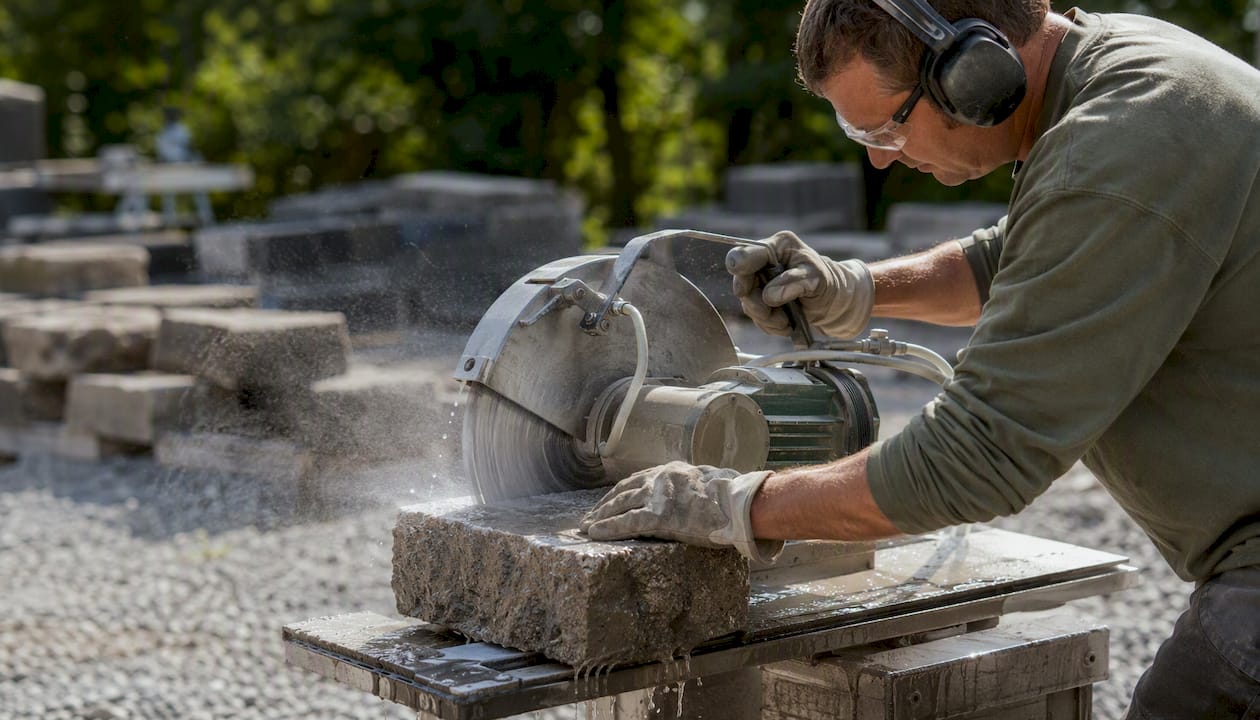
Hearing protection matters more than most DIYers expect. A gas-powered plate compactor running for hours produces sustained noise loud enough to cause real hearing damage over a weekend project. Steel-toed boots are worth the investment too, given how often block and stone get dropped during stacking.
Trenching carries its own risks separate from tool use. Never dig a trench deeper than about waist height without sloping the sides back or shoring it, and never work in a trench alone. If you’re excavating near a fence line, utility markings, or a neighbor’s foundation, call your local utility locating service before you dig, not after you hit something.
Our Take: Local Experience Building Terraces Across Southern Arizona
Southern Arizona’s terrain gives terraced retaining walls a particular kind of urgency that a lot of general guidance misses. Between rocky, thin-soil slopes in the foothills and the intensity of monsoon downpours that hit hard and fast after months of dry ground, drainage design here isn’t optional detailing, it’s the difference between a wall that lasts decades and one that fails in its first wet season.
Jackpotlandscape has built tiered retaining walls across Tucson and the surrounding foothills where a single tall wall simply wasn’t the right call. A retaining wall project in the Catalina Foothills needed a stepped design to manage a steep natural grade while keeping usable, plantable space on each level, an outcome homeowners consistently point to as the difference between a wall that just holds back dirt and a terrace that actually adds living space to the property.
What we’d tell any homeowner before a contractor even walks the site: take clear photos of the full slope from top and bottom, measure the approximate height and length of the area you’re considering, note any visible utility lines or meters, and think through what’s going to sit near the top of the slope, whether that’s a pool, a driveway, or just a patio. That prep turns a first site visit from a guessing exercise into a real conversation about design options.
Get a Terraced Retaining Wall Estimate From a Local Team
If you’ve read this far and you’re weighing DIY against hiring it out, here’s the honest tradeoff: a properly engineered, multi-tier terrace with correctly sized geogrid and independent drainage on every level is a specialized build, and getting it wrong costs far more to fix than it would have cost to build right the first time. Jackpotlandscape has installed retaining walls, pavers, and travertine hardscapes across Tucson and Southern Arizona for over 15 years, which means we’ve already solved the desert-specific drainage and soil challenges your project will run into.

Before your first estimate visit, gather a few things: photos of the slope from multiple angles, rough measurements of height and length, notes on any visible utilities, and a sense of what will sit near the top of the slope, whether that’s a driveway, a pool, or just foot traffic. That’s enough for our team to start scoping the project realistically.
Every installation is backed by quality materials suited to desert conditions and a workmanship warranty, and our full range of landscaping services extends terraces into finished outdoor spaces, whether that means paver pathways connecting your benches or a low-water turf zone on an upper tier. If you’re ready to see what a terraced design could look like on your property, reach out for a site visit and estimate.
Frequently Asked Questions
How far apart should terraced retaining walls be spaced? A common starting point is spacing tiers at least twice the height of the lower wall. Closer than that, the upper wall’s load transfers to the lower wall as surcharge and typically requires added geogrid or an engineered review.
Do I need a permit for a terraced retaining wall? It depends on your local code, but many jurisdictions set single-wall height thresholds around 3 to 4 feet that trigger permitting, and some also apply combined-height rules when tiers sit close together. Check with your local permitting office before finalizing your design.
Can I build a terraced retaining wall myself? Short tiers on dry, stable soil with no nearby surcharge are a realistic DIY project using segmental block. Multiple tiers, poor soils, or loads like a driveway or pool nearby are strong signals to bring in a contractor or engineer instead.
Why is wood not recommended for terraced retaining walls? Timber typically lasts only 10 to 20 years against wet backfill because constant moisture contact rots the wood from the inside, which is a short lifespan compared to segmental block or concrete options that commonly last 50 years or more.
What’s the biggest cause of terraced retaining wall failure? Sharing drainage between tiers instead of giving each wall its own independent drain pipe and gravel system is one of the most frequently cited causes of failure in tiered designs.
Sources
- Terraced Retaining Walls | Allan Block
- Retaining Walls and Terracing
- Design Methodology for Tiered MSE or Concrete Block Retaining Walls (CTR report)
- VERSA-LOK Technical Bulletin: Tiered Walls
- How to build retaining wall steps and base guidance (The Spruce)
- Terraced Retaining Wall: Complete Guide for Homeowners